One of key benefits of Modern Management is that you can get out of the “having to manage content” business. In traditional PCLM products, this can take a huge amount of time. Sure, I’ll admit that there can be an odd sense of satisfaction seeing your content distribute across hundreds or perhaps thousands of DPs (we’re control freaks right?). However, even if we get out of that business, we still need to ensure our networks aren’t taken down by huge content downloads from thousands of clients. Without peer to peer technology, this can be very challenging when everything comes from the cloud. This is where Microsoft’s native BranchCache comes in. It’s built right into Windows 10 and gets the job done remarkably well. Oh and it’s super easy to enable and configure in Workspace One.
Pre-Reqs
There are only a few pre-reqs that you need to be aware of:
- Enable File Storage in your environment – this really only applies if you are running your own on-prem instance. All dedicated and shared SaaS environments have this turned on by default.
- Firewall Ports – WS1 automatically configures the Windows Defender Firewall rules when the BranchCache profile is installed. However, for the Third-Party firewall you might have to configure the ports manually.
| Direction | Protocol | Port | Application | Action |
|---|---|---|---|---|
| Inbound | TCP | 80 | SYSTEM | ALLOW |
| Inbound | UDP | 3702 | =%systemroot%\\system32\\svchost.exe | ALLOW |
| Outbound | TCP | Any (Remote 80) | SYSTEM | ALLOW |
| Outbound | UDP | Any (Remote 3702) | =%systemroot%\\system32\\svchost.exe | ALLOW |
How BranchCache works with Workspace ONE
MS has a lot of good documentation on what BranchCache is and how it works so I won’t re-hash everything here. I’ll try to summarize how it works alongside Workspace ONE
- Admin uploads an internal application to WS1 Console under Apps and Books.
- Admin configures a BranchCache profile and deploys it to a Windows 10 device. This enables necessary BranchCache services on the client as well as firewall rules for Defender Firewall. Additionally, it enables WS1 Software Distribution (SFD) for Branch cache on the server. This means that all future software deployments to the device with be BC enabled.
- When the device receives a BC-enabled software deployment. WS1 first verifies that a BC profile has been successfully installed on the device and then breaks up the content into segments and generates a hash of the content with the server secret for each segment and stores it on the server. This is called Content Information (CI) and is very small in size (KBs).
- On the client, the SFD agent creates a BITS job on the with a DS URL. It will be listed in the Content Manifest XML in the corresponding registry key and have a Source Type=”P2P_BC” before the URL (HKEY_LOCAL_MACHINE\SOFTWARE\AirWatchMDM\AppDeploymentAgent\ContentManifests).
- BITS then uses that URL to get the CI from the server. It first looks in its local cache for content and if none is found it then uses WebService Discovery of peers to see if any of the content is available for each segment of data. Multiple peers can securely serve different pieces of content based on what is avaialble. If no peers are available, then BITS will use the URL to download content from the source server.
- If this happens, the request back to DS will have a MissingdataRequest=true in the header and DS will respond with a redirect to the CDN URL (if CDN is enabled).
- Content is download and the SFD agent installs the app just like it would any other way.
Different Types of BranchCache Modes
There are a few different types of BranchCache modes that WS1 supports:
- Distributed – This will be your most common setting and enables peers to look for and find content from any peers on the local subnet.
- Hosted – This allows you to tell clients to look for content always from a specific host. This basically sets up a distribution point, but it can be a regular windows 10 machine instead of an actual server. I would only recommend doing this for sites that have very low bandwidth as well as for the clients at that site that don’t move around too much.
- Local – Configures clients to look only in their own local cache for content.
- Disabled – Disabled BranchCache service completely on clients.
Let’s Set it Up – Distributed Mode
- Login to WS1 console
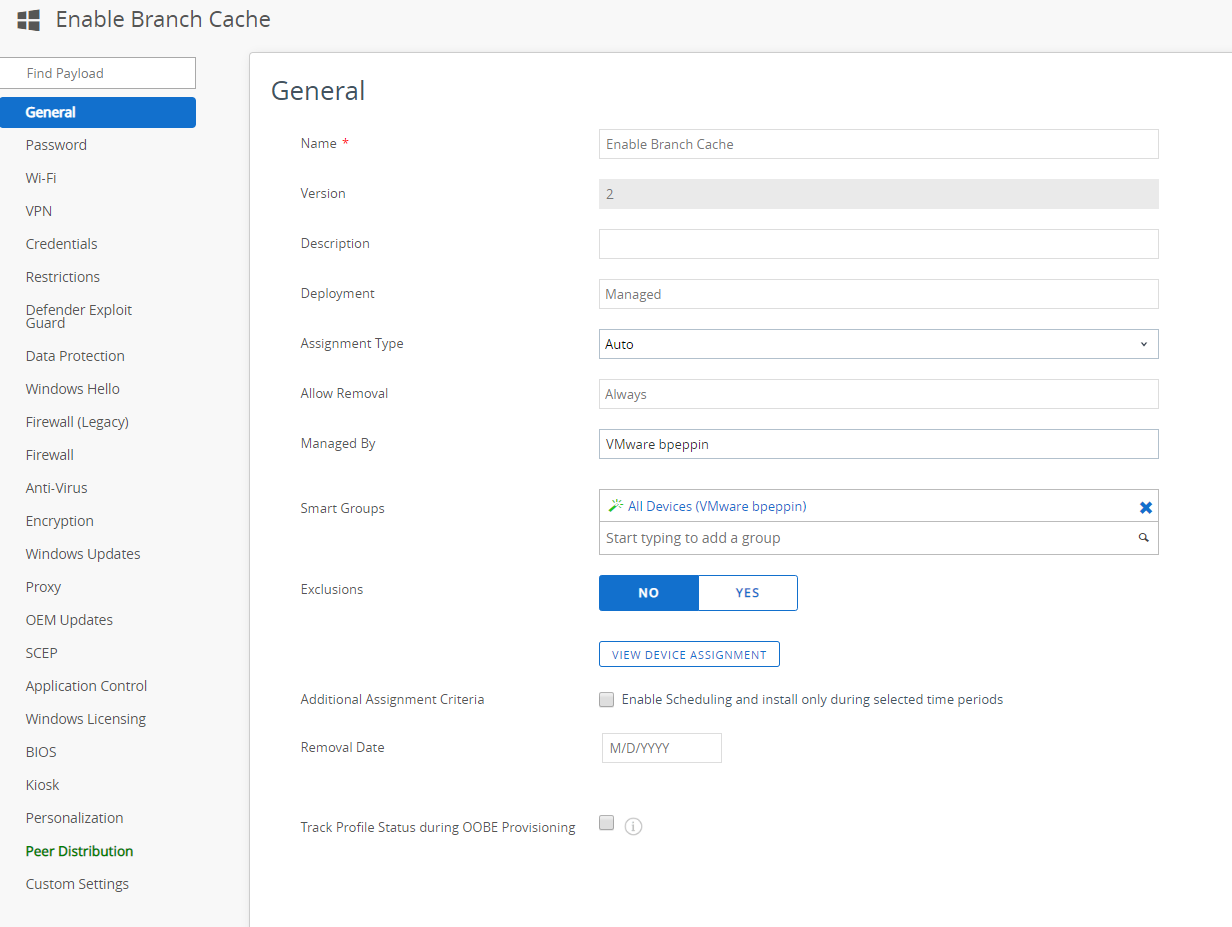
- Create a new Profile. Windows > Windows Desktop > Device Profile.
- Under General tab, fill out the basic information on the profile. I like to make profile “Optional” while we test.
- Select Peer Distribution on the left hand side (toward bottom) and click Configure
- Select Distributed Mode. I like to bump up my settings to have a minimum age of 30 days and 10% disk space. Adjust accordingly.
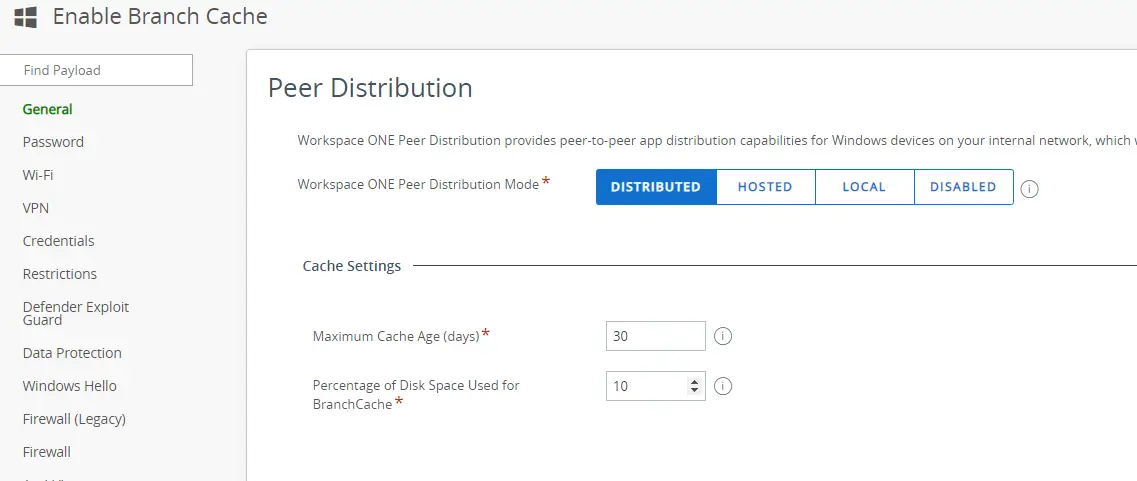
- Click Save and Publish
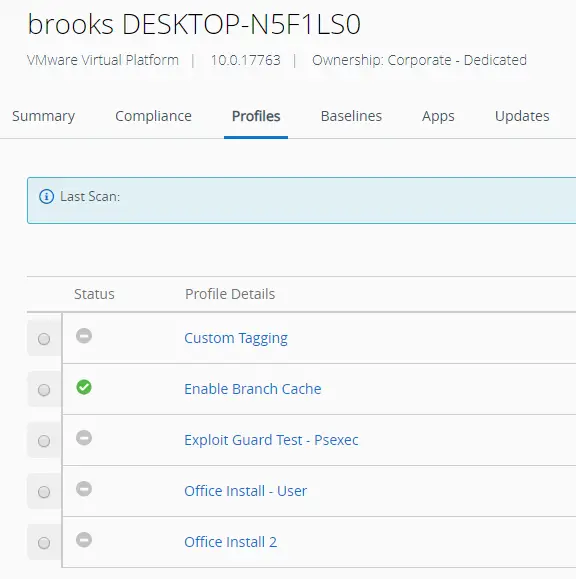
- Push profile to client and it should successfully install
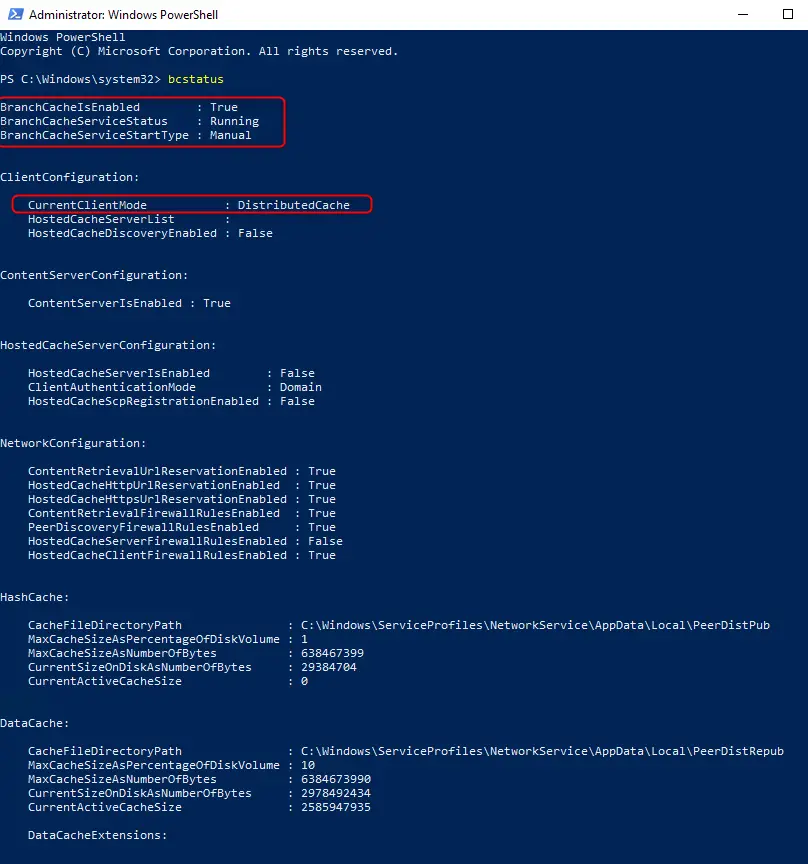
- On the client launch and elevated Powershell window and run bcstatus. You should see that BranchCacheIsEnabled=true and that the configuration is DistributedCache.
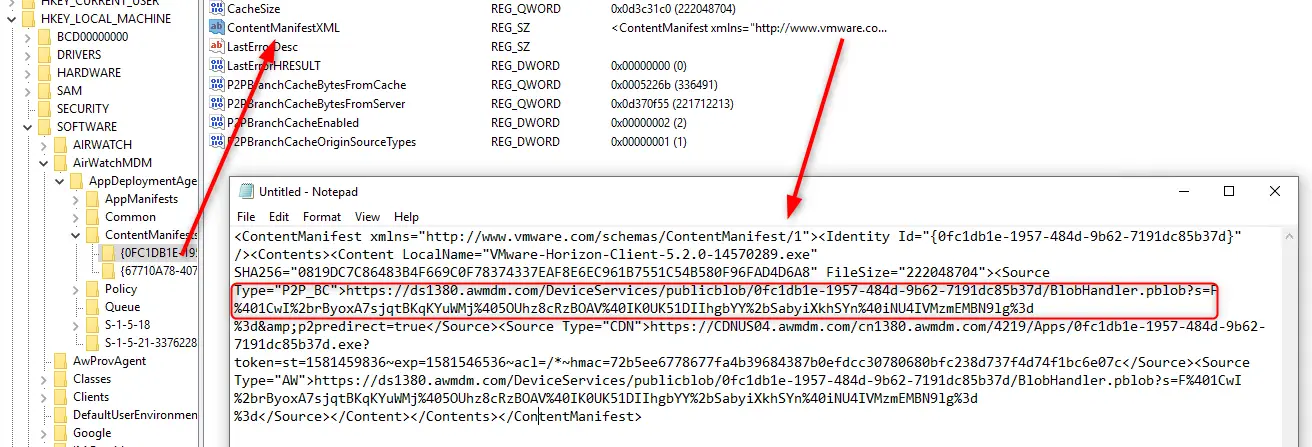
- Push an App to the device. Look up the content manifest located here: HKEY_LOCAL_MACHINE\SOFTWARE\AirWatchMDM\AppDeploymentAgent\ContentManifests\{App GUID}
- Double-click Content Manifest XML and copy/paste it into notepad. You should see the a URL with <Source Type=”P2P_BC”> as the first in the list and a DS URL listed there too
How to Tell it’s Working
Obviously the first download will not come from peers and so it will be slower as it downloads directly from DS/CDN. After the download completes, run bcstatus again and you should see the CurrentActiveCacheSize go up in size.

Do note that even if you had previously deployed that same app to other peers on your subnet, it won’t be BranchCache enable unless those other peers have the BC profile installed and then the app deployed afterwards. Only apps deployed after BC is enabled on clients are enanbled for BC.
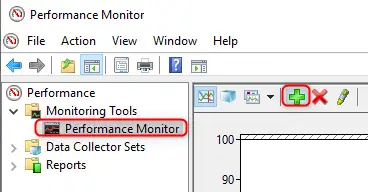
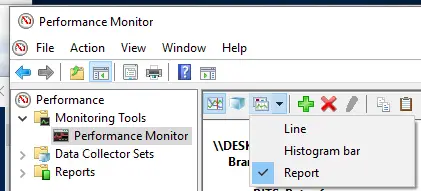
You can track near real-time stats by loading up Performance Monitor. Click on Performance Monitor and then click the green plus sign.
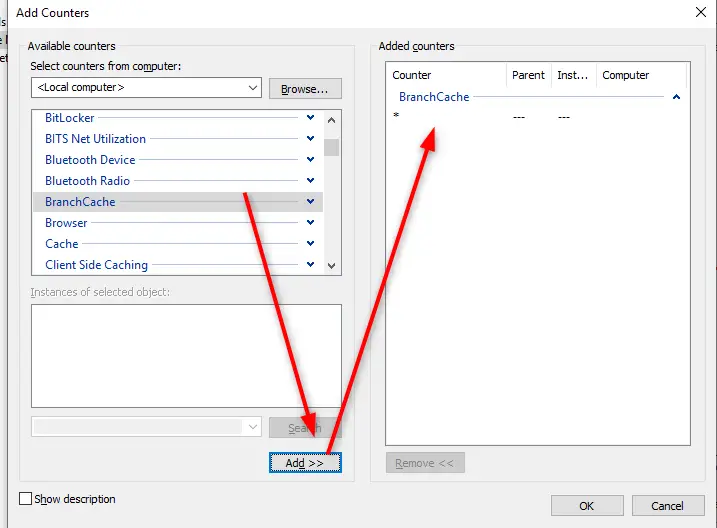
The find BranchCache on the left and add it as a counter.Click Ok.
Change the view to be “Report” for easier viewing of stats.
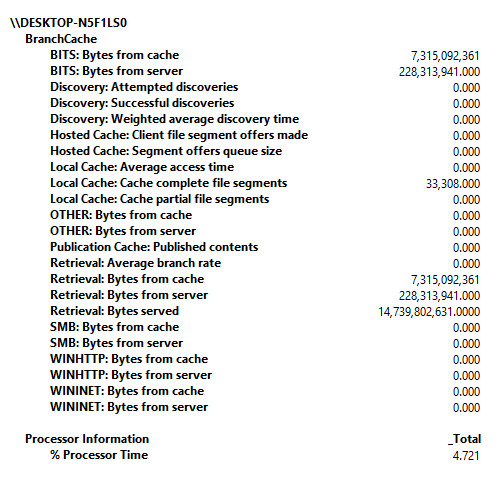
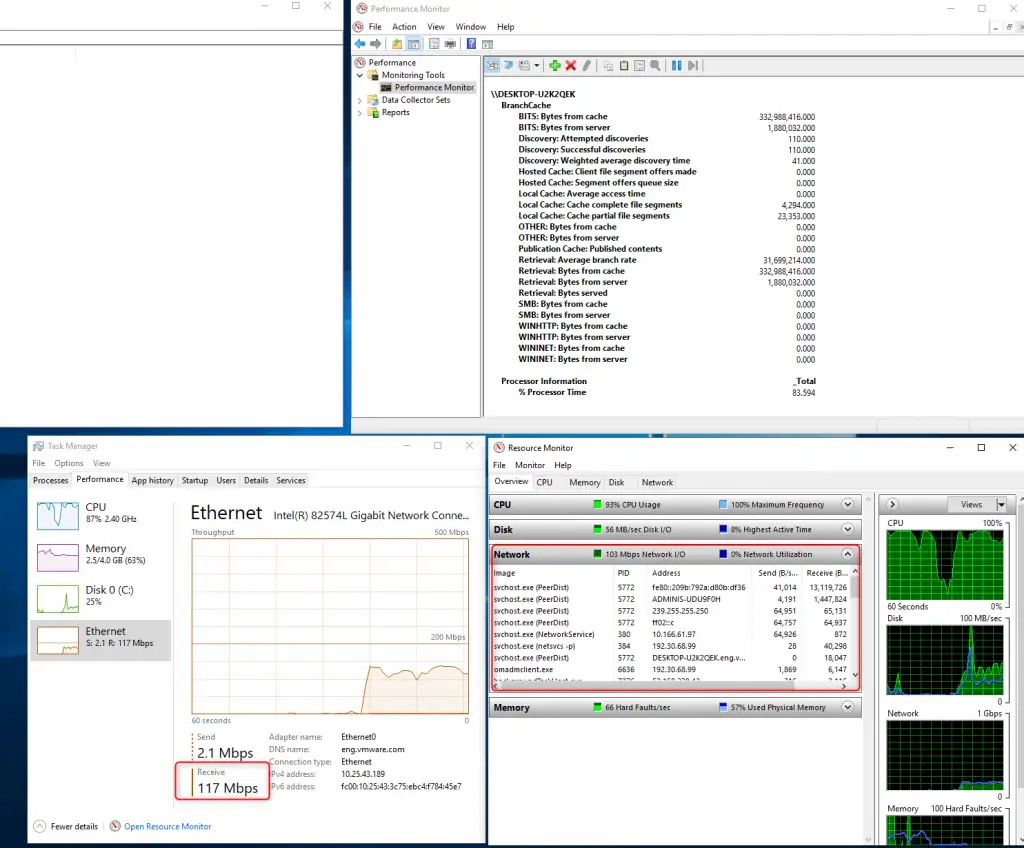
Spin up a 2nd peer on the same network as this one and repeat the steps. You should see peer #2 get content from peer #1. I also like to load up Performance Monitor and Task manager to watch the network traffic and juicy speeds!
And that’s it! My next blog will cover additional troubleshooting steps so stay tuned.
when you say ‘When the device receives a BC-enabled software deployment’ .. what configuration is need on the console to make a software deployment BC enabled ?
Deepu – You have to first deploy the “peer to peer” profile to devices. UEM looks to see if that profile is installed. If it is, then it will use branch cache to deploy. If it is not installed, then it will not use P2P and use whatever other method you have configured (i.e. CDN).
Ciao Brooks,
in an environment with different offices in the world, do you suggest deploying the “peer to peer” profile to all Windows 10 devices or to a specific target of devices filtered somehow?
Yes, I usually always recommend just the “distributed” mode peer to peer profile. The “Hosted” mode can work for clients that are permanent to one location (like desktops). You can setup one client as a “host” and it can serve the content to the others.
Hi,
I’ve the smb shared and configured as hosted mode but the profile keep failing,can you pls advise?
What errors are you getting either in console or on client?