Workspace ONE Sensors enable you to collect any custom piece of information from a Windows 10 client that Workspace ONE UEM doesn’t natively collect. This feature was added in version 1905 of WS1 and enhanced in 1910 with 64bit Powershell support. This feature can be used for all kinds of things, but after working with several customers I thought it worthwhile to write up some best practices so that you can avoid some common pitfalls.
One Sensor for One Data Point
This means that you really need to create a sensor to collect a single data point. Think of it like a column in a database: you only want each column to have one piece or type of data. This is for two reasons:
- It keeps sensors simple and thus faster to run on the client
- The data must be accessed from Workspace ONE intelligence via Reports and this means that each sensor name will become a column. If you have comma separated values it gets harder to read, sort, and consume the data.
If you absolutely must have multiple data points sent in one sensor, I’d recommend setting the output as a string value to a single variable and then returning the variable like this:
[string]$internet = Get-InternetTime
[string]$client = (get-date)
$compare = "Internet:" + $internet + ",Client:" + $client
return $compare
Add Author and Date to Description Field
If you have a larger environment with multiple admins creating and deploying sensors, it’s very important that you train everyone to add their name and a brief description of what the sensor is supposed to do.
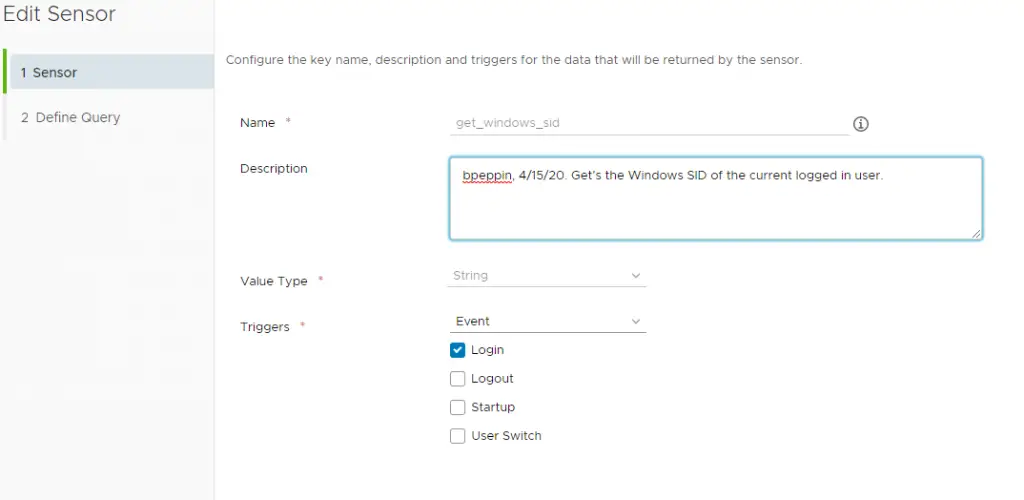
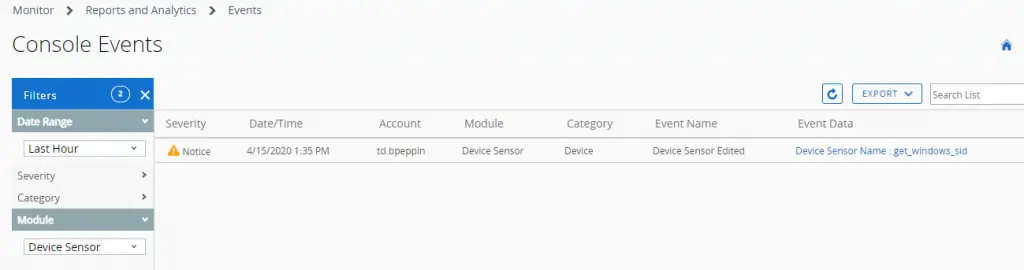
If someone edited or added a sensor and did NOT complete this info, you can check it in Console Events. Go to Monitor > Reports and Analytics > Events > Console Events. Change module to “Device Sensor” to filter it. Don’t forget to adjust the Date Range Filter as well.
Be Mindful of Execution Context and Architecture
Execution Context
System: This runs in “system” context and does not depend on a logged in user. Most sensors should be set to this. If a user is logged out, then sensors will only run on the agent schedule and the Hub will not respond to AWCM commands such as when you manually click Query > Sensors .
User: This runs as the logged-in user context. Keep in mind this has to be the same as the enrolled user. So if Bob logs into my system, but it’s enrolled to me, this user sensor won’t run.
Execution Architecture
Mousing over the information bubble explains it pretty well. Most of the time this should be set to auto, but you can override the bitness if needed. This was recently added in WS1 UEM console version 1910 so double check your sensors to ensure they are set to “Auto” as by default they maybe have been set to 32-bit after the upgrade. Additionally, clients need to be on 1910 agent or higher for the added 64 bit support to work (previously it was 32-bit only).
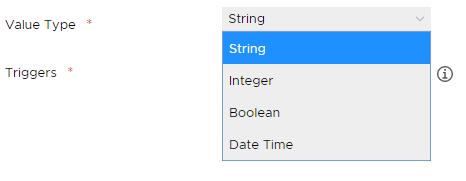
Align Correct Value Type
Don’t forget to set the correct “Value Type” because you can’t change it later. So whatever you output in your script you need to ensure this matches. I pretty much always set my to “string” and just ensure my output is forced to output a string variable. See my above example on how to do this.
If you have a mismatch, you’ll get an error like this:

If you don’t know what type it is, here are few example on how you can check:
$guid.gettype()
(write-output (hostname)).gettype()
(write-output (get-date)).gettype()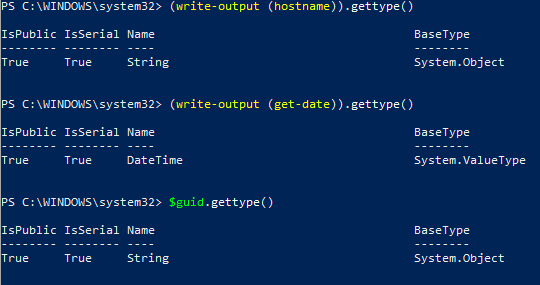
Understand the Different Triggers
There are 2 different triggers on when sensors run:
Schedule: This runs based off of the Hub check in time. This is located under Devices & Users > Windows > Windows Desktop > Windows Sample Schedule. The “Security Information Sample” is what the schedule runs on. Note: You can only view or change this if you are in a dedicated SaaS or On-Prem environment. If you are in a Shared SaaS then you’ll have to get a SaaS ticket created to change. Default is 12 hours.
You can also trigger manually by clicking Query > Sensors on device details page.
Event: Most of these are self explanatory but here it is:
- Login – Any user login event. This is NOT actually tied to the enrolled user, but any user that logs in.
- Logout – Same as above but on logout.
- Startup – Windows system boot up. Since there is not “user” context here, this only works for ones that are configured to run in System context.
- User Switch – Doing a user switch instead of full logout.
Sensor Samples
Don’t forget we have a ton of community and VMware created sensor publicly available! Click here to view them as well as a script that can be used to auto-import all of them.
And that’s it for now. Hopefully this helps you be more successfully when using Sensors! Let me know if I missed anything so I can add to this list.
Hi,
Is a Workspace ONE Intelligence license required in order to use WS1 sensors?
Thanks for more information.
Best Arian
Hi Brooks,
Thanks for the great article!
I am testing some sensor but I cannot see any result on the device details.
The Event section from Monitoring page doesn’t seem to return any error:
“Device sensor sample received Message Text : Sample received with sensors: battery_level”
Do you have any idea ?
Youssef – Unfortunately sensors don’t show up on the device details page in UEM; they are only visible with Workspace ONE Intelligence. I know that the product team definitely wants to add this to UEM, but I’m not sure exactly when it will happen.
https://docs.vmware.com/en/VMware-Workspace-ONE-UEM/2010/rn/VMware-Workspace-ONE-UEM-Release-Notes-2010.html#scripts-and-sensors-preview-13
We’ve moved Sensors under Resources so that you can find it easier. And now, not only can you use Sensors with Windows Desktop, we’ve added support for macOS. Use scripts in your Sensors to collect all kinds of data that you can view for a single device in that device’s Device Details page, on the Sensors tab. This new tab removes the need to use the VMware Workspace ONE Intelligence service. But don’t worry, if you do use Intelligence, you can continue to enjoy viewing and interacting with data for multiple devices with reports and dashboards.
You can now see the sensor collected data in device details pane
https://docs.vmware.com/en/VMware-Workspace-ONE-UEM/2010/rn/VMware-Workspace-ONE-UEM-Release-Notes-2010.html#scripts-and-sensors-preview-13
We’ve moved Sensors under Resources so that you can find it easier. And now, not only can you use Sensors with Windows Desktop, we’ve added support for macOS. Use scripts in your Sensors to collect all kinds of data that you can view for a single device in that device’s Device Details page, on the Sensors tab. This new tab removes the need to use the VMware Workspace ONE Intelligence service. But don’t worry, if you do use Intelligence, you can continue to enjoy viewing and interacting with data for multiple devices with reports and dashboards.
I’m running 21.1.0.3 (2101) and am new to the console. I’m not seeing a newly created sensor in the details pane. What am I missing
Are you in a shared SaaS environment? It should be enabled for shared SaaS, but it’s not quite available for dedicated SaaS. If you are on dedicated SaaS, then you can request access to our shared testing/beta environments (CN135/136/137). Your VMware account rep can help you request access to this.
Hey Brooks,
I am trying to return the value of a registry key value..
I am getting and error that it cannot find the path when I put this code into the sensor.
$StorageRegKey = “HKCU:\SOFTWARE\Policies\Microsoft\Windows\RemovableStorageDevices”
$RegDword = “Deny_all”
$regDwordValue = Get-ItemPropertyValue -Path $StorageRegKey -Name $RegDword
if($regDwordValue -eq 1){write-output $true}
else {write-output $false}
This code works perfectly in ISE and regular PS .
I have to change the code to :
$regDwordValue = Get-ItemPropertyValue -Path HKCU:\SOFTWARE\Policies\Microsoft\Windows\RemovableStorageDevices -Name Deny_all
if($regDwordValue -eq 1){return $true}else {return $false}
to get it to work in WS1?? Thoughs
That is a bit odd and not something I’ve had issues with normally. It either is a bug or I would double-check your quotes. Make sure you type them out vs copy/paste from another source. From your comment, they look like formatted quotes but I’m not sure if that is just due to putting them into the comment field or if that really is how it is on your console.
Hi Brooks,
Thanks for the article and the great information. I have been messing around with Sensors to try and get the Hardware Hash to report in WS1 so I can export them for Autopilot enrollment. Fumbling around with it for a bit, I was able to get the Hardware Hash to fully show in an error message in the troubleshooting logs in WS1. However, I can’t report on the hash that is only in the error message. When I check the awprocesscommands.log on the device it says, “invalid because output length is greater than 1KB length.” Do you know of any way to get a sensor to work for a hardware hash or is it simply limited by the 1KB length limitation? It looks like the hardware hash is 4000 characters. It would be great to be able to report on these for devices already enrolled in our WS1 environment. Thanks again for the article and your time.
Hey Jon – The 1kb limitation is set at the Ws1 platform level can’t be changed by an admin. If you are saas customer, you can try submitting a ticket to request for them to increase this limit. I feel like I remember some customers being able to do that when I still worked there. Also – you may not need to really do this as you can deploy a powershell script via a win32 app (or product provisioning) and automatically register every computer into autopilot. You can also do the json method https://docs.microsoft.com/en-us/mem/autopilot/existing-devices