In my last walk through video, I went through how to setup a basic multi-app kiosk PC using custom Kiosk XML. Since then, I’ve worked with other customers to deploy kiosk mode in a few different ways and so I’d like to summarize each in this blog.
What is the difference between single-app mode and multi-app mode
Microsoft has pretty good documentation on this, here’s the just of it:
- Single-app kiosk mode runs a UWP app in fullscreen and above the lock screen. There is no way to close the app, see the desktop, or click on the start-menu or task bar. Note that this is exclusive to UWP apps. You can’t run single app mode with apps such as Zoom or Chrome. However, there are ways to mimic this single app mode behavior using multi-app mode, which I’ll detail below.
- Multi-app mode only allows the apps that you specify. This profile automatically creates a basic Kiosk user account and automatically logs into it if the devices is restarted. It then comes to a full screen start menu that is locked into the apps you specify. This is useful if you want to give access to more than one app (such Edge and Horizon as detailed in my video), or the app(s) are not UWP. RS5 (1809) also adds a few optional nodes you can add to the XML that enhances the experience:
- Explicitly allow some known folders when user opens file dialog box
- Automatically launch an app when the user signs in
- Configure a display name for the autologon account
Single App Kiosk Mode (UWP apps only)
Single App Kiosk Mode mode is specific to UWP apps only and auto-launches the the app in fullscreen mode and does not show the desktop or start menu. This uses the “Assigned Access” CSP, however it does NOT use the “KioskModeApp” node as that is deprecated starting in version 1803. It instead uses a KioskModeApp profile underneath the configuration node. It also requires that you get the AUMID of the UWP app.
Take a look at the sample XML . The main line to make this work is:
<KioskModeApp AppUserModelId="Microsoft.WindowsCalculator_8wekyb3d8bbwe!App"/>
To get the AUMID simple run the get-startapps powershell command. Then just ensure that the Profile ID and the Default profile ID match. In my example above, I’m setting the device to run calculator is kiosk mode. Who doesn’t want a full Win10 PC running only calculator in fullscreen mode?? To deploy via WS1 UEM do these simple steps:
Grab the sample XML and update it with the AUMID of the UWP you’d like to use.
Create a new profile in WS1 UEM console and assign it to your smart group (recommend setting it to an optional profile while you test and validate).
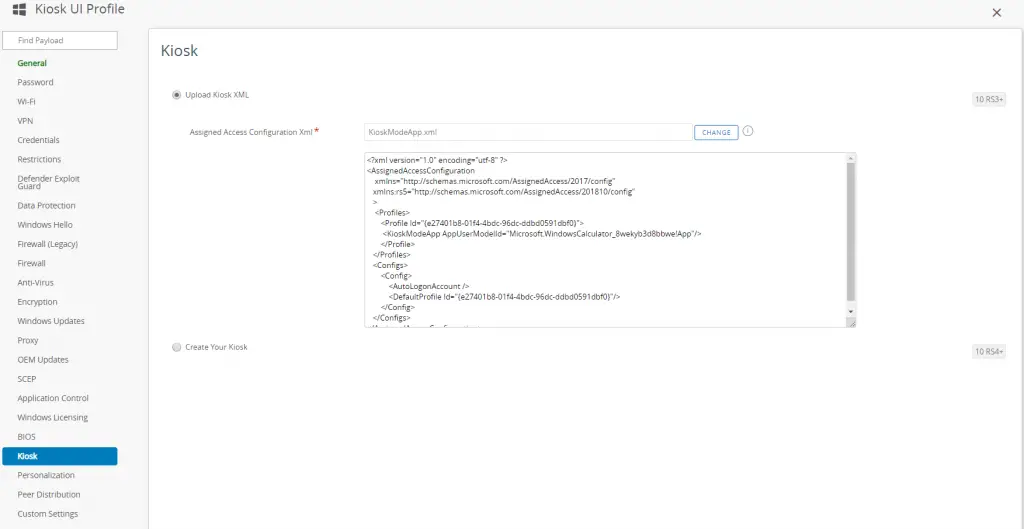
Click on “Kiosk” on left side.
Upload your XML there and click “Save and Publish”
Multi-App Kiosk Mode – Create your Kiosk
My video details this use case but uses the “upload Kiosk XML” option in the WS1 UEM profile. However, there is another option called “Create your Kiosk” that provides a clearer UI to create the start menu items and select multiple apps. Here’s how to configure it:
First, make sure you upload and configure any non-UWP apps (such as chrome or Horizon) ahead of time in the Apps & Books section.
Once complete, create the Kiosk profile and assign a smart group (you have to make assignment in order to configure the payload section).
Select “Create your Kiosk” and click “Configure”.

On your third party apps, click the little “gear” icon to configure the path to executable. Click Save.
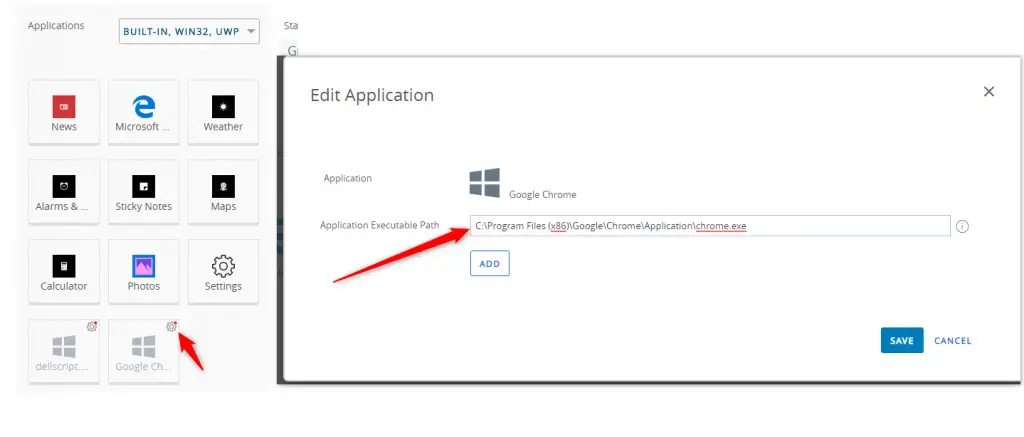
Then you can drag that app to the start menu screen

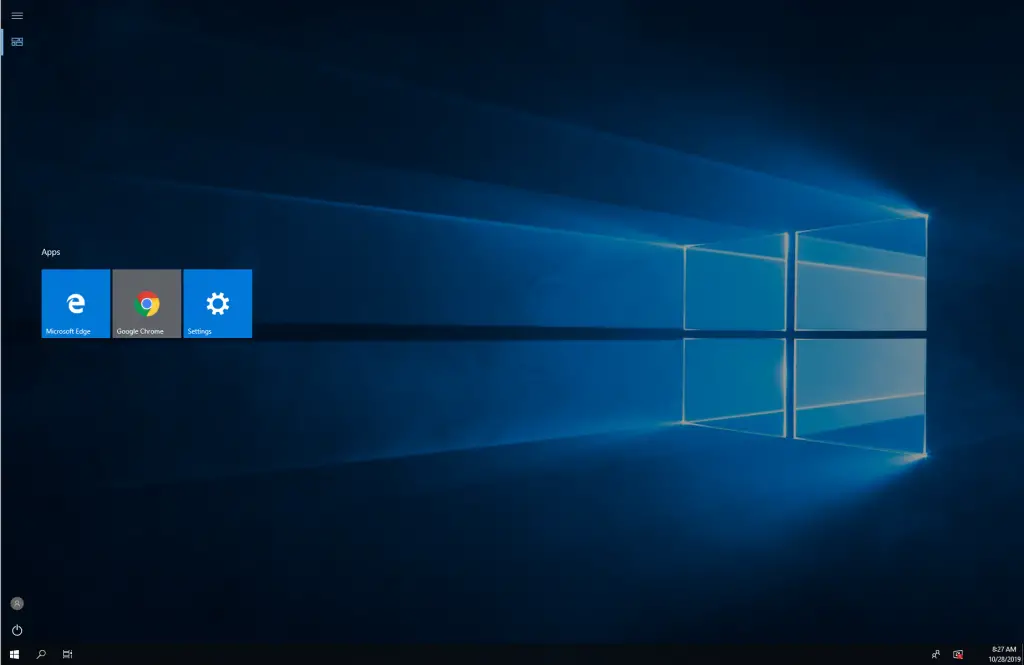
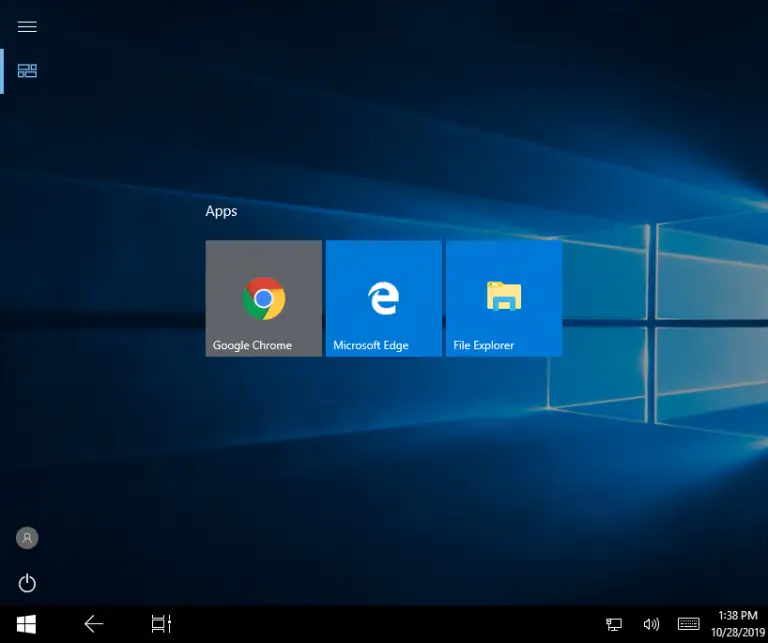
Once you’re happy with this, click save. Remember though that you do have to assign and deploy the app (such as Chrome) to the device before the Kiosk profile goes down to it. The timing of this can be a bit tricky since you can’t fully control the order of profile install. If they install out of order, you might see the start menu not have the correct icon for your app. In that case, just re-push the Kiosk profile app and it should show up. Once both have been successfully applied, reboot the machine and it should auto-login and look like this:
Multi-App mode with Chrome and File Explorer restrictions (RS5)
By default, file explorer access is restricted. This means that if you attempt to save a photo or download from Chrome, it will allow you to save it to “This PC”, but you won’t be able to get back to that file. Looking at the Kiosk documentation, we can see that MS added “Known folder support” for the downloads folder in 1809.
” Starting in Windows 10, version 1809, you can explicitly allow some known folders to be accessed when the user tries to open the file dialog box in multi-app assigned access by including FileExplorerNamespaceRestrictions in your XML file. Currently, Downloads is the only folder supported. “
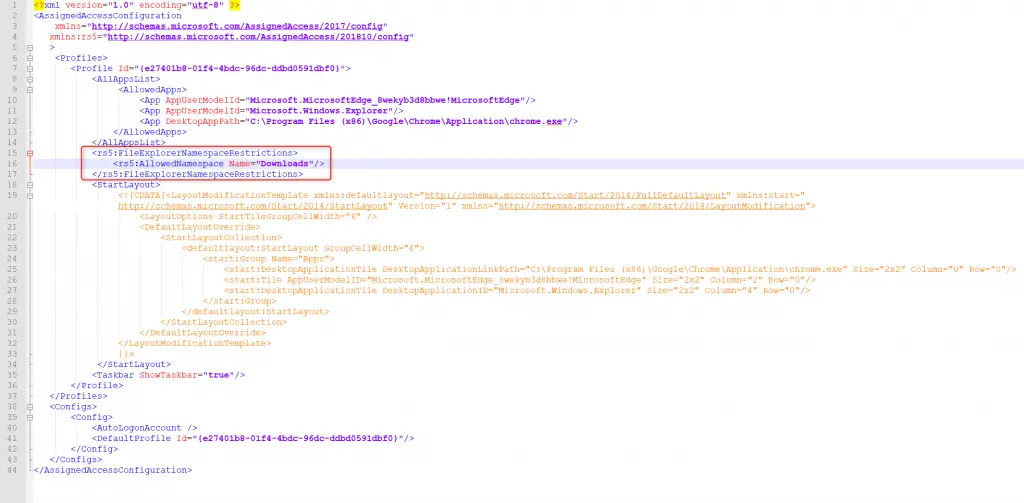
So what we can do is configure our XML to have chrome, edge, and explorer set as trusted apps and then add this XML node to enable downloads folder access.
Copy this XML section:
       <rs5:FileExplorerNamespaceRestrictions>
           <rs5:AllowedNamespace Name="Downloads"/>
       </rs5:FileExplorerNamespaceRestrictions>
And paste it into your Kiosk XML:
Now, in order to deploy this via Workspace ONE in the current release (1910) is that we have to “encode” the XML and then deploy via a custom settings profile. We unfortunately can’t use the “upload kiosk XML” button in the Kiosk payload as this does xml parsing and it doesn’t have support for the RS5 nodes (yet). Encoding is very easy. Follow these steps:

2. Copy the text from the “Output” section and paste in between the <Data></Data> nodes in the custom settings profile. Click here for sample.

3. Then take the whole things and put that into a custom settings profile
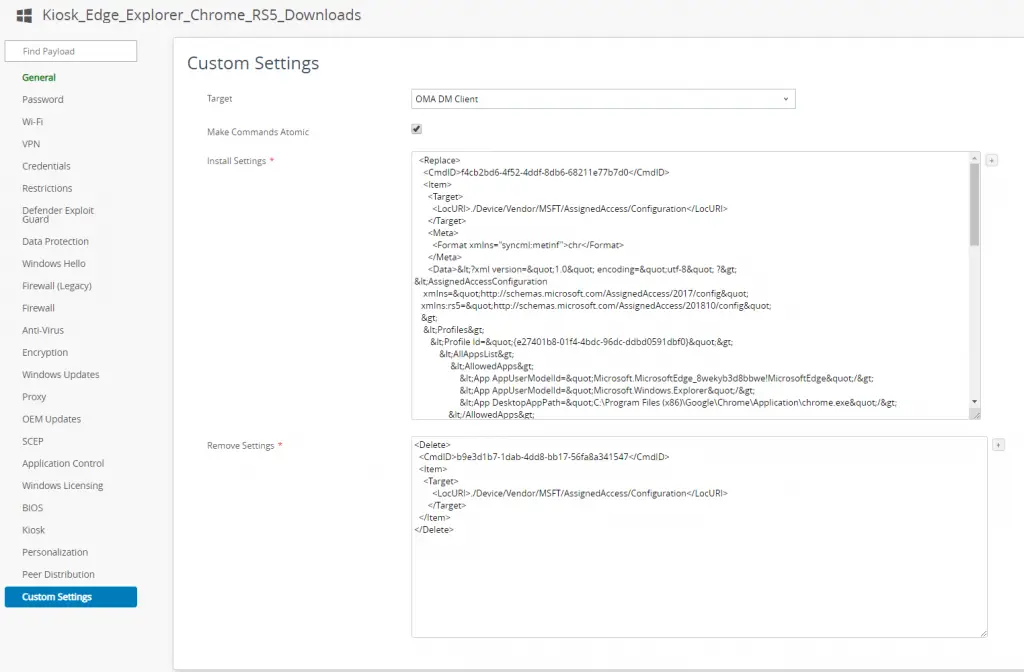
For Remove Settings, you can copy/paste this:
<Delete>
  <CmdID>b9e3d1b7-1dab-4dd8-bb17-56fa8a341547</CmdID>
  <Item>
    <Target>
        <LocURI>./Device/Vendor/MSFT/AssignedAccess/Configuration</LocURI>
      </Target>
  </Item>
</Delete>
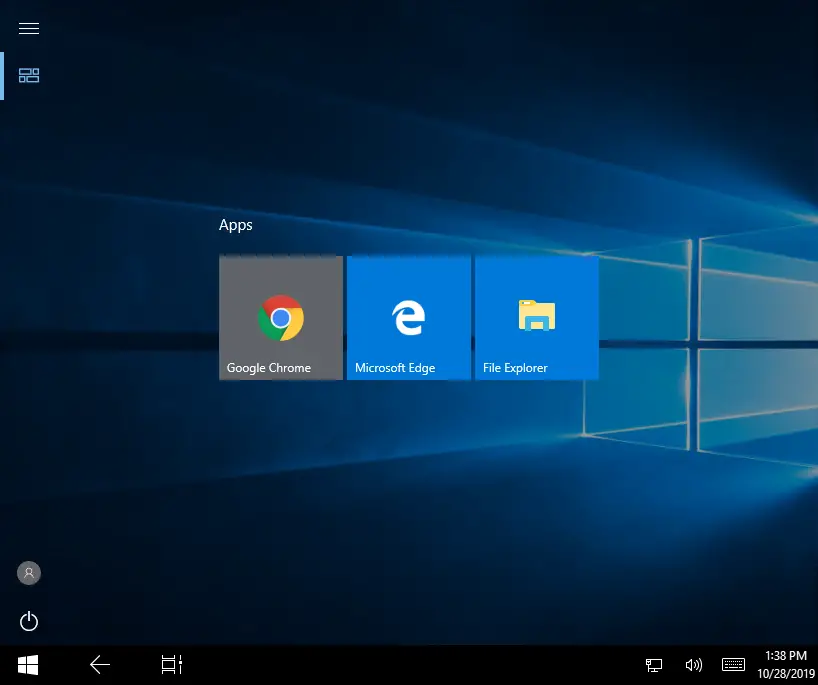
Then assign to a device, install the profile and then reboot. After it comes up it should auto-login and then look like this:

Multi-App Mode to auto-launch single app (RS5)
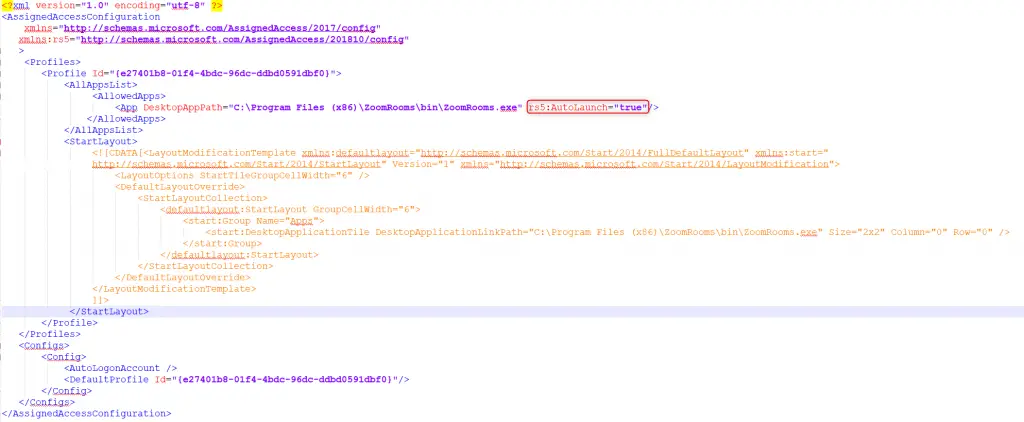
RS5 has another feature for auto-launching of apps in multi-app mode. You do this by adding rs5:AutoLaunch=”true” after the AUMID or desktop shortcut path in the Allowed Apps section of the XML. If you do that, it will auto-launch it in fullscreen mode. This is especially useful if you want to basically get single app kiosk mode but you have a win32 app and can’t use the actual single app mode (since that is limited to UWP only). In my example, I’ll be setting up a Zoom Room PC that will automatically launch the Zoom Rooms exe. The steps to deploy are identical to the multi-app method above, with the exceptions being deploying the zoom rooms exe and configuring the XML to have autolaunch=true. Click for sample xml.
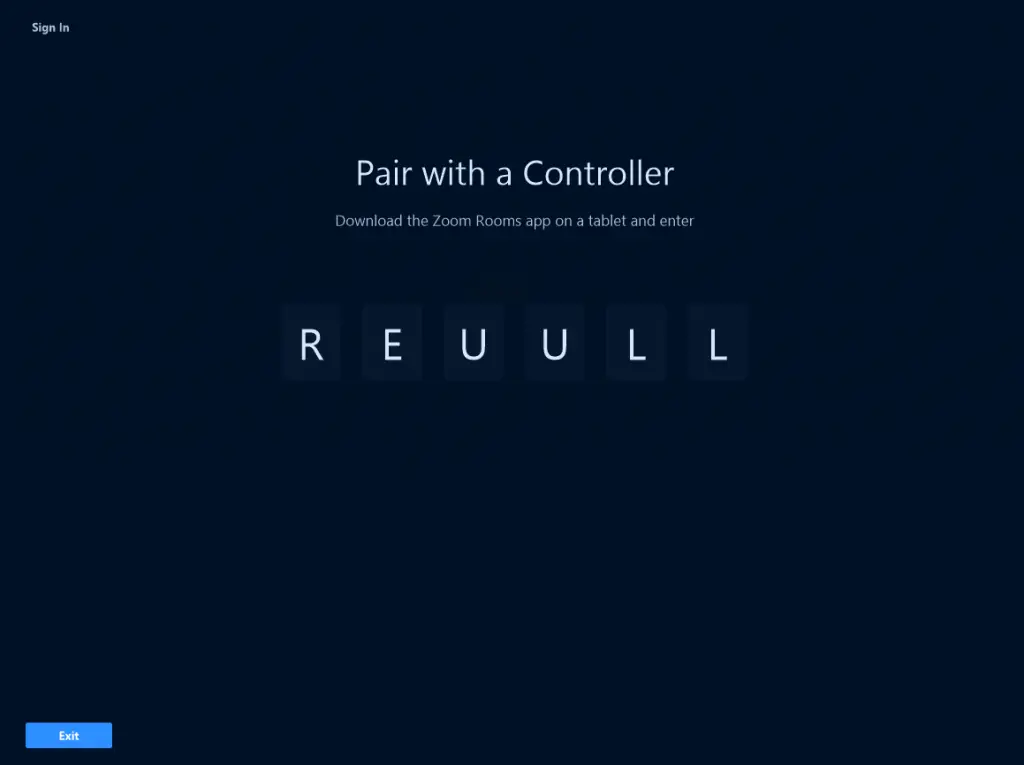
After deploying and restarting your device, you will see the Kiosk profile auto-login and then launch the zoom rooms app. Pretty cool!
Note that there is also rs5:AutoLaunchArguments=”123.txt” which allows you to pass arguments to the auto-lauching app.
There are a lot of ways to deploy Kiosk mode on Windows 10. Workspace ONE can help you deploy each depending on your use case. Are there any use cases I missed? If so, please let me know!
Does Kiosk payload support xml parsing for the RS5 nodes in 20.08+ version of Workspace One UEM?
Could you please update the link of the examples? REgards