This blog post will detail how to automatically enroll a Windows 10 system into VMware WorkspaceONE that has been newly imaged with an MDT task sequence.
Prep
- Grab the staging account credentials from Groups & Settings –> All Settings –> Devices & Users –> Windows –> Window Desktop –> Staging & Provisioning. Grab the “UPN” and “Secret”.
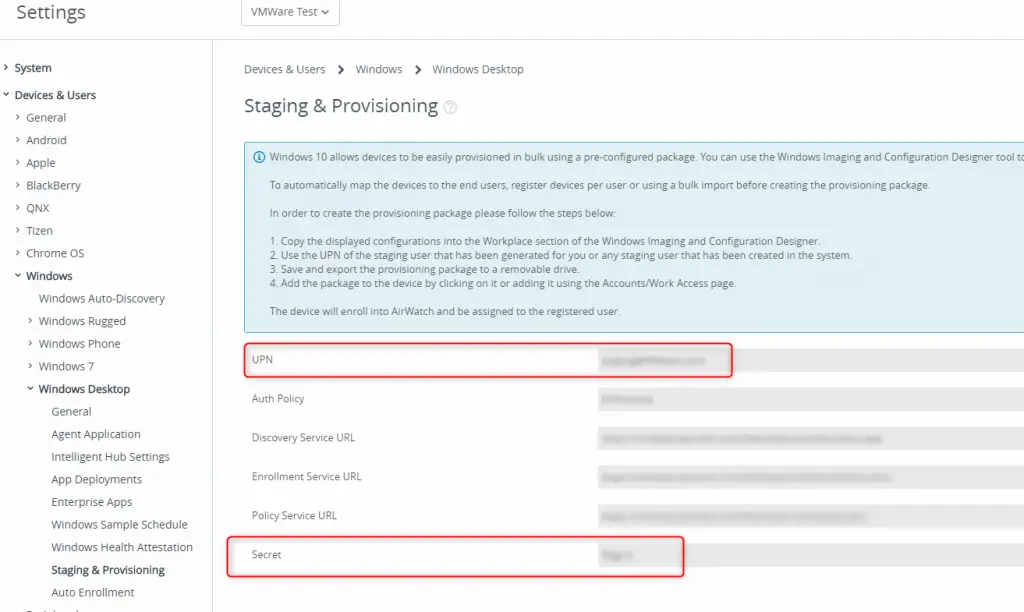
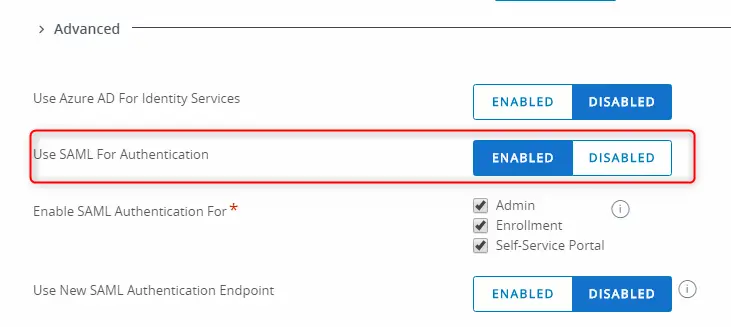
- Double-check that you don’t have SAML turned on for this Organization Group. You can check by going to System–> Enterprise Integration –> Directory Services. Scroll down to Advanced and check whether “Use SAML for authentication” is enabled. If so, you will need to create a sibling OG (i.e. one that is at the same level as this OG) and use the staging account from there. NOTE: In 1811, this SAML limitation is going away and it will not be required to create a separate OG if SAML is turned on.
- Sync your domain users into Workspace ONE Console using the ACC
- Domain join setup as part of your MDT Task Sequence
Setup MDT
- Download the latest Workspace ONE Hub agent (AirwatchAgent.msi) from https://getwsone.com/
- Place these in a temp folder somewhere on your deployment share (I usually use C:\Staging).

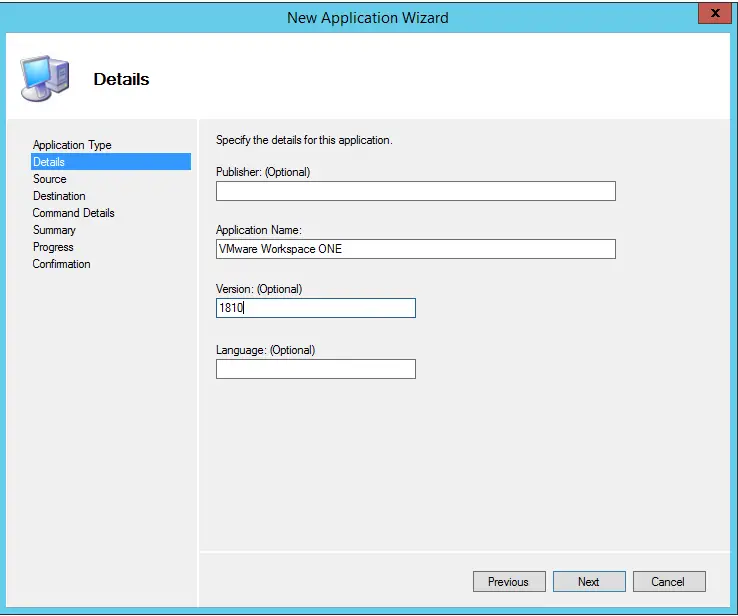
- In the MDT workbench, create a new Application.
- Select “Application with Source Files” and click Next.
- Specify application details
- Specify source directory (in my case c:\staging\workspaceONE)
- Specify the name of the target directory that will be created (I usually leave default)
- Command Line: msiexec /i AirwatchAgent.msi /quiet ENROLL=Y SERVER=[servername] LGName=[OGname} USERNAME=[UPN of staging user] PASSWORD=[staging user secret]
- Server = Your enrollment server info found by going to Settings –> System –> Advanced –> Site URLs. Grab the Devices services url but truncate it so that it looks like this format:
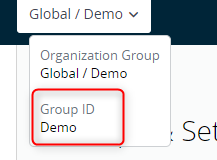
yourserver.awmdm.com - LGName = The OG Group ID you want to enroll at. Mouse over the OG in the console to get the Group ID.
- Username/Password = the UPN and secret of your staging user

- Server = Your enrollment server info found by going to Settings –> System –> Advanced –> Site URLs. Grab the Devices services url but truncate it so that it looks like this format:
- Click Next, Next, and then Finish.
- Now go to your deployment Task Sequence. Browse down to the “State Restore” section and expand the Custom Tasks folder. Or you can simply create a new “Standard Client Task Sequence”. I like to move all tasks (such as deploying apps or scripts) into this folder.
- Click Add –> General –> Install Application
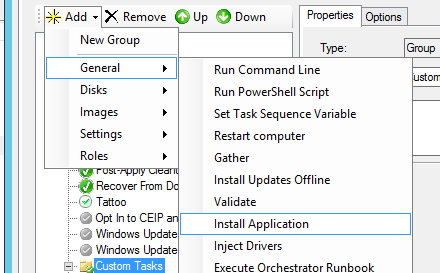
- Select “Install Single Application” radio button.
- Browse for the VMware Workspace ONE 1810 Application you created earlier.
- I like to copy/paste the Name of the Application into the “Name” field.
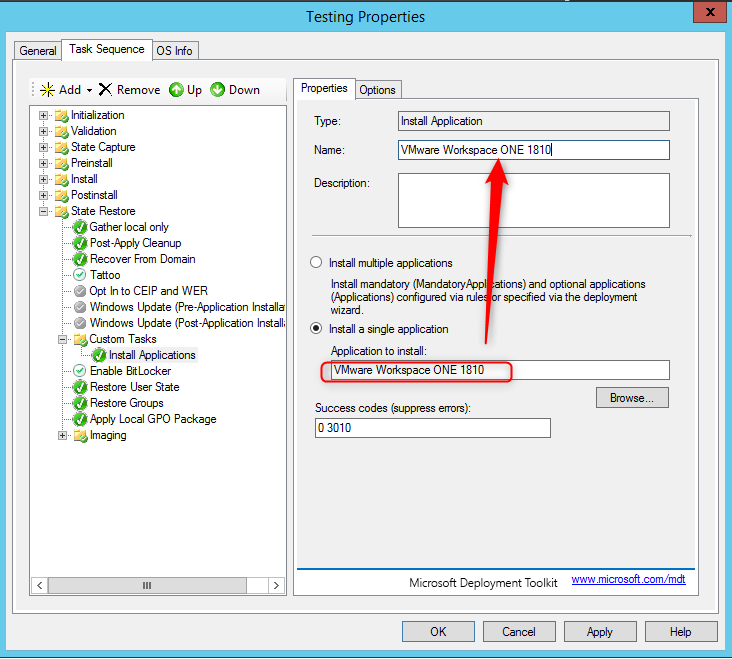
- Click Apply.
- Run through your Task Sequence and this application will install in the administrator account after the OS is deployed. I am assumed you have domain-join setup as part of this task sequence as well so then after the TS has completed, simply log in as your domain user and that user will be automatically enrolled.
Hi Dear, I tried the same method but the device is not showing in the UEM console. After login with domain user, Hub is not showing. If I try to install the hub again with the domain user it will give me the error ” not allowed by administrator”. Please recommend if there is any video or solution available.
Note: I am not using the default domain join or recover from the domain task in TS. I am joining the domain with a custom PS script.
Thanks,
Hi Brooks, love your work mate. is this still the best way to go for non factory provisioned dell devices?
I’m in an SCCM environment moving to WS1, 400 Dell laptops were purchased without factory provisioning a couple of years ago, so it seems I need to set up an WDS, MDT, WS1 Provisioning automated build environment / process?
Cheers