Do you need to query Active Directory during an MDT task sequence? Maybe it’s for checking the computer name to see if it already exists or maybe it’s to query OU information. I worked with a client recently that had this exact use case. In order to do this, we need to add the PowerShell Active Directory to WinPE so that we can leverage the AD cmdlets such as get-ADComputer or Get-ADOrganizationalUnit.
Since this module requires RSAT tools to be installed and enabled on either a Windows 10 or Windows Server OS in order to function, we’ll need to grab some files and then add them into WinPE. This blog will walk through all of the steps required to do just that.
Prerequisites
There are just a couple of prerequisites:
- I tested this on PowerShell 5.1.
- You’ll need to install the RSAT ActiveDirectory tools on a supported Windows 10 or Windows Server OS. In my examples, I’m using Windows 10 20H2.
- Make sure to have the Windows 10 ADK installed and integrated with MDT.
- I did everything on the 64 bit version of WinPE and Windows 10, but since we’ll be copying in both 32 and 64 bit files it should work just fine in the 32bit version of WinPE as well.
Installing RSAT Tools
First, we’ll need to install the RSAT: Active Directory Domain Services and Lightweight Directory Services Tools optional Windows feature. Thankfully, as of Windows 10 1809, this has become a feature-on-demand instead of a manual download and install. To install it, follow these steps:
- Open up the Optional Features section of Windows Settings (Settings > Apps & Features > Optional Features)
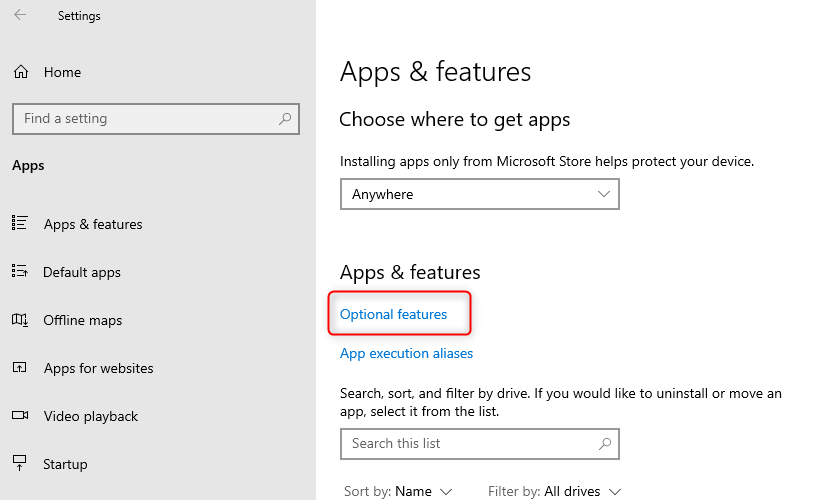
- Click on Add a feature
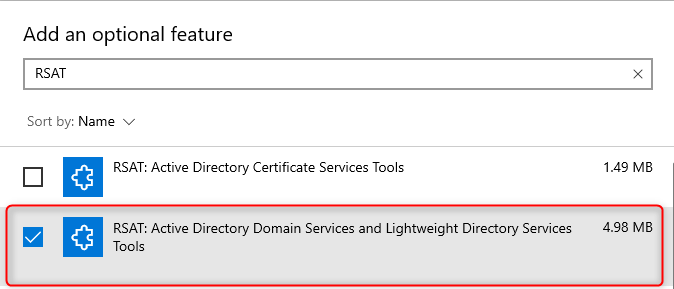
- Search “RSAT” and check the box next to RSAT: Active Directory Domain Services and Lightweight Directory Services Tools. Click Install.
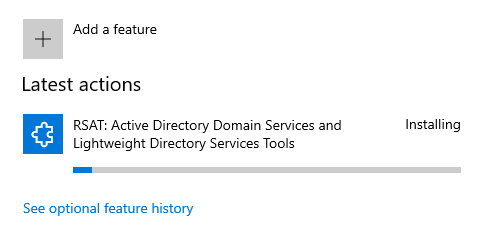
The feature will complete the installation after just a minute or two
Copy Required Files
Now that RSAT is installed, we’ll need to copy several folders from Windows into a temporary folder and then import them into MDT. There are quite a few of them and you will need to maintain the correct folder tree structure. Note that the folders and files under the WinSxS do have a Windows version number in them, so you may need to tweak the batch file to reflect the version you have installed on your system.
Folders
- C:\Windows\Microsoft.NET\assembly\GAC_32\Microsoft.ActiveDirectory.Management
- C:\Windows\Microsoft.NET\assembly\GAC_32\Microsoft.ActiveDirectory.Management.Resources
- C:\Windows\Microsoft.NET\assembly\GAC_64\Microsoft.ActiveDirectory.Management
- C:\Windows\Microsoft.NET\assembly\GAC_64\Microsoft.ActiveDirectory.Management.Resources
- C:\Windows\System32\WindowsPowerShell\v1.0\Modules\ActiveDirectory
- C:\Windows\SysWOW64\WindowsPowerShell\v1.0\Modules\ActiveDirectory
- C:\Windows\WinSxS\amd64_microsoft.activedir..anagement.resources_31bf3856ad364e35_10.0.19041.1_en-us_b5227ce13cf0f1c3
- C:\Windows\WinSxS\amd64_microsoft.activedirectory.management_31bf3856ad364e35_10.0.19041.1_none_ce8760641580df00
- C:\Windows\WinSxS\msil_microsoft-windows-d..ivecenter.resources_31bf3856ad364e35_10.0.19041.1_en-us_f2fc2efc70a53a7a
- C:\Windows\WinSxS\x86_microsoft.activedir..anagement.resources_31bf3856ad364e35_10.0.19041.1_en-us_5903e15d8493808d
- C:\Windows\WinSxS\x86_microsoft.activedirectory.management_31bf3856ad364e35_10.0.19041.1_none_7268c4e05d236dca
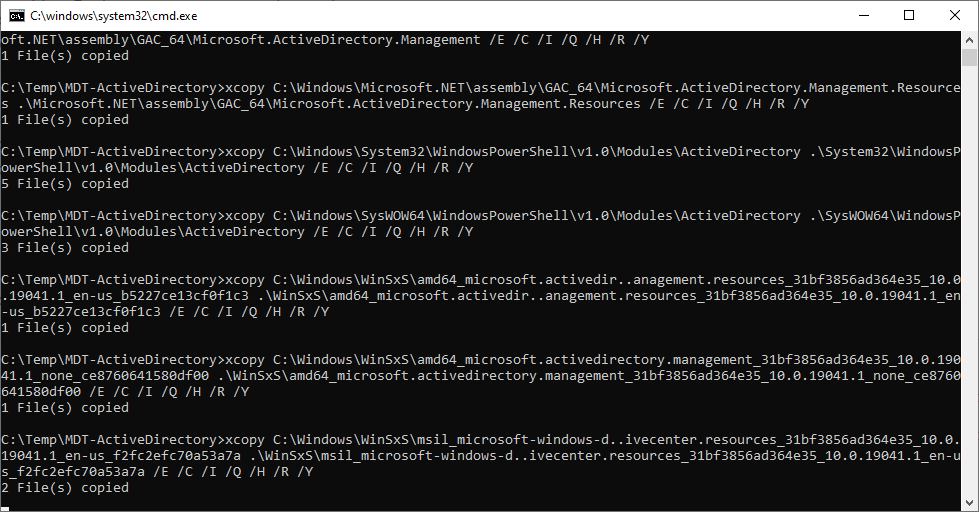
If you don’t feel like copying these in manually, I’ve created a simple batch file that will copy all of the files need into your temp directory.
- Create the temporary folder, say C:\Temp\MDT-ActiveDirectory
- In File Explorer, navigate to the folder, and create a new file called copy.bat
cd %~dp0
xcopy C:\Windows\Microsoft.NET\assembly\GAC_32\Microsoft.ActiveDirectory.Management .\Microsoft.NET\assembly\GAC_32\Microsoft.ActiveDirectory.Management /E /C /I /Q /H /R /Y
xcopy C:\Windows\Microsoft.NET\assembly\GAC_32\Microsoft.ActiveDirectory.Management.Resources .\Microsoft.NET\assembly\GAC_32\Microsoft.ActiveDirectory.Management.Resources /E /C /I /Q /H /R /Y
xcopy C:\Windows\Microsoft.NET\assembly\GAC_64\Microsoft.ActiveDirectory.Management .\Microsoft.NET\assembly\GAC_64\Microsoft.ActiveDirectory.Management /E /C /I /Q /H /R /Y
xcopy C:\Windows\Microsoft.NET\assembly\GAC_64\Microsoft.ActiveDirectory.Management.Resources .\Microsoft.NET\assembly\GAC_64\Microsoft.ActiveDirectory.Management.Resources /E /C /I /Q /H /R /Y

xcopy C:\Windows\System32\WindowsPowerShell\v1.0\Modules\ActiveDirectory .\System32\WindowsPowerShell\v1.0\Modules\ActiveDirectory /E /C /I /Q /H /R /Y
xcopy C:\Windows\SysWOW64\WindowsPowerShell\v1.0\Modules\ActiveDirectory .\SysWOW64\WindowsPowerShell\v1.0\Modules\ActiveDirectory /E /C /I /Q /H /R /Y

xcopy C:\Windows\WinSxS\amd64_microsoft.activedir..anagement.resources_31bf3856ad364e35_10.0.19041.1_en-us_b5227ce13cf0f1c3 .\WinSxS\amd64_microsoft.activedir..anagement.resources_31bf3856ad364e35_10.0.19041.1_en-us_b5227ce13cf0f1c3 /E /C /I /Q /H /R /Y
xcopy C:\Windows\WinSxS\amd64_microsoft.activedirectory.management_31bf3856ad364e35_10.0.19041.1_none_ce8760641580df00 .\WinSxS\amd64_microsoft.activedirectory.management_31bf3856ad364e35_10.0.19041.1_none_ce8760641580df00 /E /C /I /Q /H /R /Y
xcopy C:\Windows\WinSxS\msil_microsoft-windows-d..ivecenter.resources_31bf3856ad364e35_10.0.19041.1_en-us_f2fc2efc70a53a7a .\WinSxS\msil_microsoft-windows-d..ivecenter.resources_31bf3856ad364e35_10.0.19041.1_en-us_f2fc2efc70a53a7a /E /C /I /Q /H /R /Y
xcopy C:\Windows\WinSxS\x86_microsoft.activedir..anagement.resources_31bf3856ad364e35_10.0.19041.1_en-us_5903e15d8493808d .\WinSxS\x86_microsoft.activedir..anagement.resources_31bf3856ad364e35_10.0.19041.1_en-us_5903e15d8493808d /E /C /I /Q /H /R /Y
xcopy C:\Windows\WinSxS\x86_microsoft.activedirectory.management_31bf3856ad364e35_10.0.19041.1_none_7268c4e05d236dca .\WinSxS\x86_microsoft.activedirectory.management_31bf3856ad364e35_10.0.19041.1_none_7268c4e05d236dca /E /C /I /Q /H /R /Y- Double click Copy.bat to copy the required files to your temporary folder.
Add to Microsoft Deployment Toolkit (MDT)
Now that we have our files, we will need to add them to MDT. I will be adding them into the Script folder of the deployment share.
Copy Files
- Copy the MDT-ActiveDirectory folder to your scripts folder on the deployment share (I.e. C:\DeploymentShare\Scripts)

Prep WinPE
We won’t be injecting these files into the boot image itself, but we do need to ensure WinPE has the necessary components added to it.
- Open the MDT Deployment Workbench
- Right-click the Deployment Share and click Properties
- Select the Windows PE tab and change the Platform dropdown to your desired architecture (I’m doing x64)
- Click on Features and ensure the following features are added:
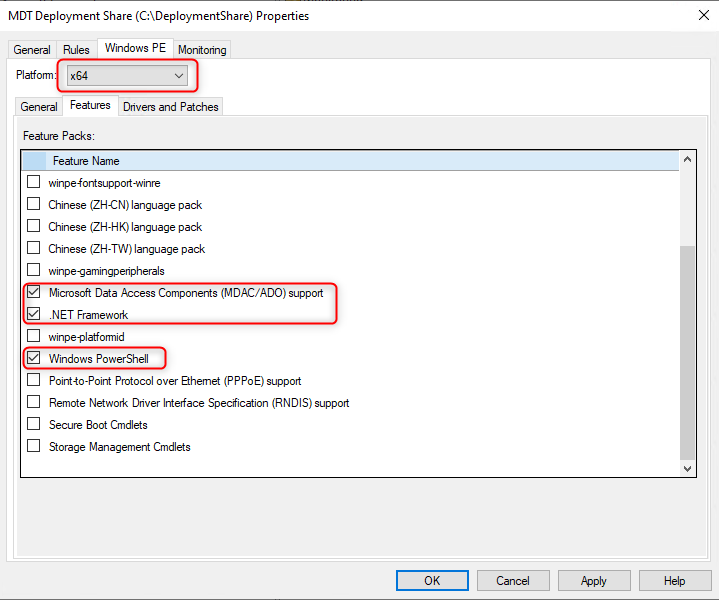
- Click Apply and OK
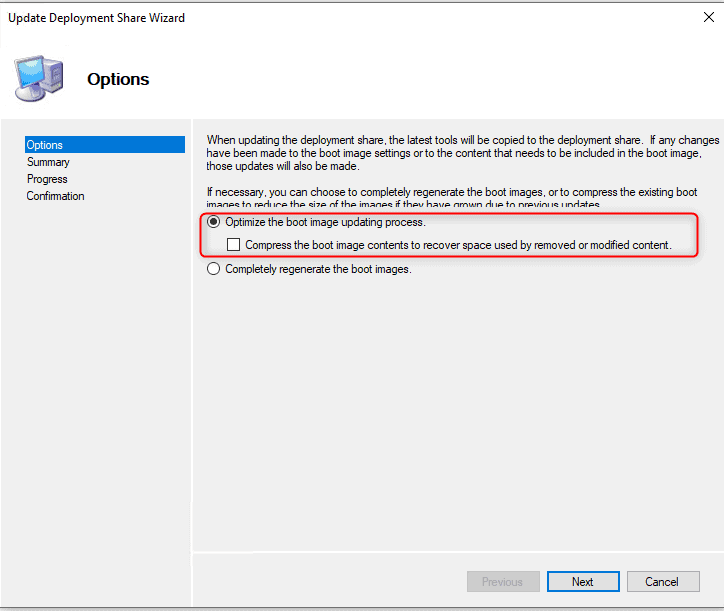
- Right-click the Deployment Share and click Update Deployment Share
- On the first page of the wizard, select the first radio button Optimize the boot image updating process and finish out the wizard to update the boot image
Enable in Task Sequence
Now that we have our boot image enabled with the required .Net and PowerShell features, and copied the Active Directory module into our Scripts folder, we need to add a step in the task sequence. This will copy the Active Directory module files to the active WinPE session.
- Edit the MDT Task Sequence.
- Click on any task under the Initialization folder folder in the beginning of the task sequence and then Add > General > Run Command Line.
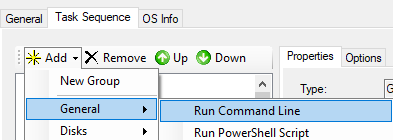
- For the Name, fill out as desired. I used: “Copy AD PowerShell Module”
- For the Command Line enter:
xcopy %SCRIPTROOT%\MDT-ActiveDirectory\* X:\Windows\*.* /D /E /C /I /Q /H /R /Y /S
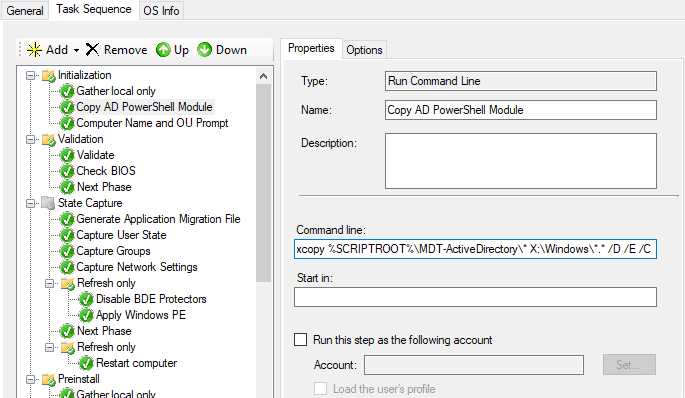
- In my case, I am also running a PowerShell script that prompts for computer name and checks it against AD as well as creating a dynamic list of OU selection. I then added this step immediately after:
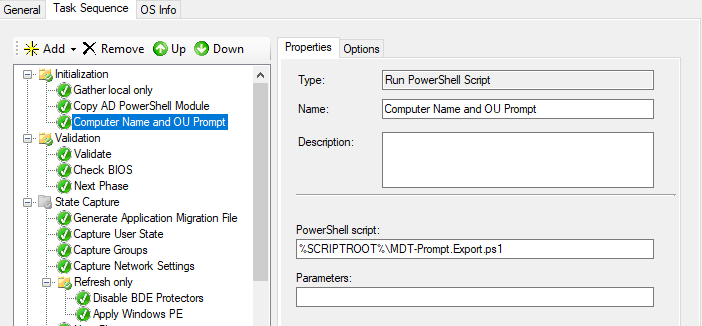
Test it Out!
We have all of the pieces in place now and are ready to test. Go ahead and boot with your updated WinPE bootable media and run your task sequence. Once your task sequence starts running and it gets past the “Copy AD PowerShell Module” step:
- Hit F8 to launch a command prompt
- Type PowerShell to switch to PowerShell
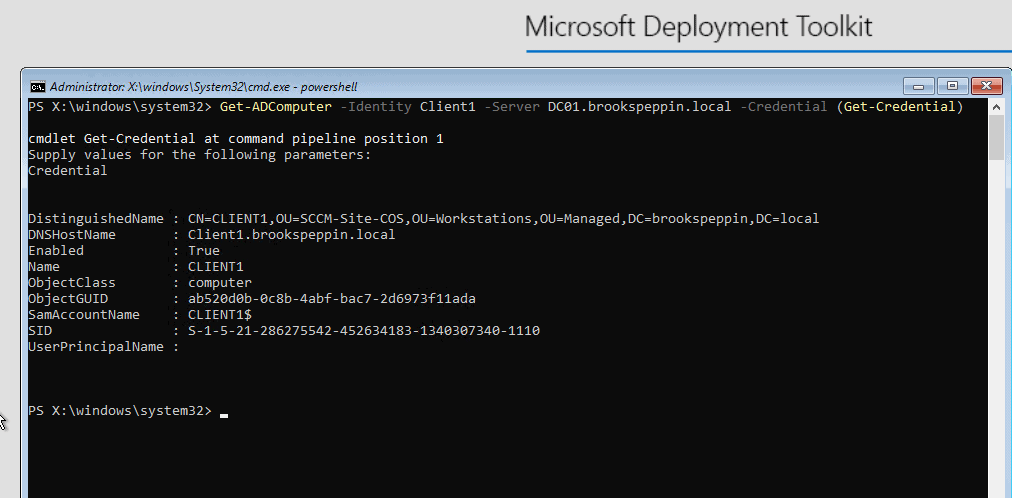
- Since the powershell module is already “loaded” in WinPE becuase we copied in the files, we can immediately start using the Active Directory cmdlets. For example, if I want to query AD for a computer name, I can run:
Get-ADComputer -Identity Client1 -Server DC01.brookspeppin.local -credential (Get-credential)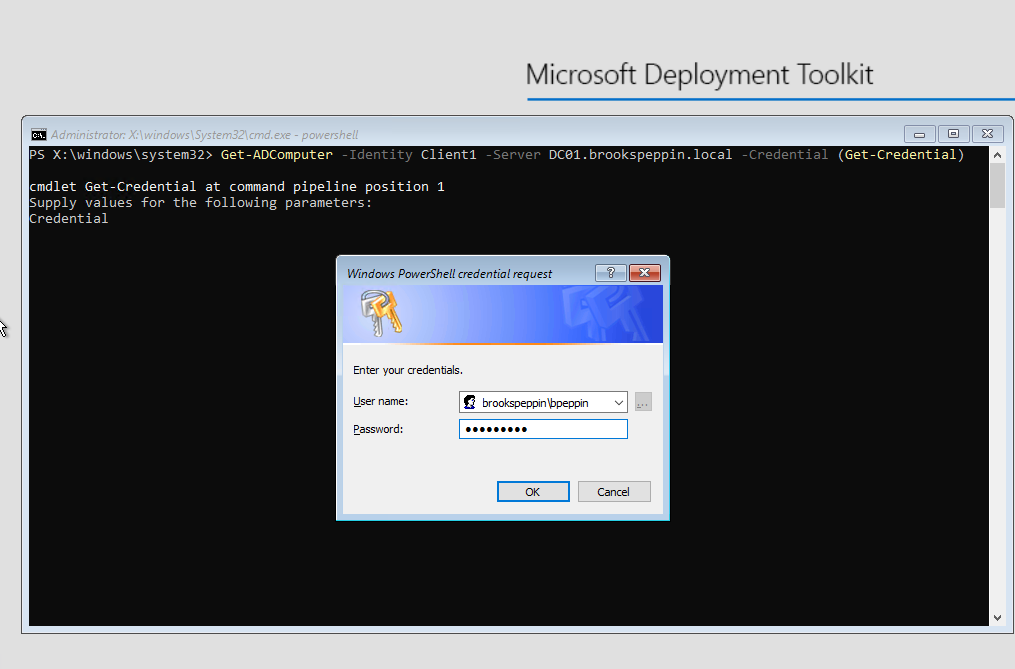
I wrote a PowerShell Tool with Powershell Studio that does a couple of things:
- Has a form that asks for computer name
- Checks it against AD to see if it already exists. If it exists, it prompts the technician if they want to take over this object.
- It then queries AD for available OUs that the system can be joined to
- Does a final confirmation and if Yes, sets two task sequence variables to those values (OSDDomainOUName, OSDComputerName)
Check it out below!
You can access this PowerShell Studio project on my GitHub page.
Conclusion
Now you know how to add the PowerShell Active Directory module into WinPE and use it in an MDT task sequence. You can run the AD cmdlets manually or integrate them into a script as I’ve shown in this guide. Remember to secure credentials if you do end up using a script!
Hey,
Nice post, thank you a lot to share!! ¿Could you please share the code to ComputerName Prompt and OU Picker?
Best Regards,
Johan
for me is not working:(
A correction needs to be made under the “Enable in Task Sequence” section. The command used to copy the AD files to WinPE in the task sequence is missing two backslashes; between ‘MDT-ActiveDirectory’ and ‘*’ ; also between ‘Windows’ and ‘*.*’
It currently reads:
xcopy %SCRIPTROOT%\MDT-ActiveDirectory* X:\Windows*.* /D /E /C /I /Q /H /R /Y /S
It should read:
xcopy %SCRIPTROOT%\MDT-ActiveDirectory\* X:\Windows\*.* /D /E /C /I /Q /H /R /Y /S
Good catch! Thank you, post has been updated.
Could you also share your code for the tool you made that checks the machine name and OU against AD please? This looks incredibly useful.
I added it to my GitHub page! https://github.com/brookspeppin/Blogs/tree/main/How%20to%20Add%20PowerShell%20Active%20Directory%20Module%20to%20WinPE%20(MDT)