Workspace ONE UEM has a rich set of APIs that can be used for all sorts of useful things. They are based on the REST API (or RESTful API) standard. This is one of the most common standards used by applications or microservices to communicate with one another. You can use these APIs in Workspace ONE to query devices, users, applications, or pretty much anything in the UEM console. You can also take actions such as deleting something, moving objects around, or creating new items such as applications.
In this blog, we will walk through how to use REST API in Workspace ONE UEM, connecting to UEM securely using the OAuth protocol, and then using both PowerShell to make API calls.
REST API Basics
In essence, REST API has several components:
First, you need the “endpoint” URI/URL. This is the destination or target API that has the data you need. For example, the following endpoint “/api/mdm/devices/search?” has the main function I need in order to search for devices in UEM (only the first page of devices will be returned). The full URL will include the UEM server and look like this: https://cn1506.awmdm.com/api/mdm/devices/search?
We’ll cover how to find the various endpoints in a later section.
Second, you’ll need a method. This is the “Action” you want to take. The main ones are GET, POST, PUT, or DELETE. Generally, you’ll use GET to read data, POST to create data, PUT to make changes to existing data, and DELETE to delete data. While some of the APIs in Workspace ONE UEM don’t 100% follow this standard, this is usually what is implemented. In practice, I use GET or POST the most often and DELETE only occasionally. I rarely use PUT.
Third, a “header” is always supplied in the request. This header includes several components including:
- Authorization : The credentials or tokens that give access to your UEM environment.
- accept : Specifies the content type and API version. For version 1 you’ll use “application/json”. For version 2 you’ll use “application/json;version=2”
- Content-Type : Set this to “application/json“
And finally, the last piece in the call is an optional one: the Body. Most API calls don’t require this, but normally you’ll need it when doing POSTs and creating objects. It is also used when doing bulk calls such as bulk deleting devices. For example, you can send a list of devices in the body, say 100 device IDs, and then when you pass that in the API call, UEM will do the bulk deletion of 100 devices with only one API call. This is a way more efficient way of doing a large number of deletions as opposed to doing 100 individual “delete device” calls.
Now that you know the basics of how a REST API call is constructed, let’s discuss next how to securely create a connection to your UEM environment.
Understanding OAuth
Workspace ONE has three different ways to authenticate via REST API: Basic Auth, Certificate Auth, or OAuth. OAuth (Open-Authentication) is the most secure and best way to connect and this is the way I’ll be demonstrating here. OAuth is an open standard that enables and secures delegated access. You use this any time you grant a service permissions to do something on your behalf without actually knowing your password to the other service. For example, letting Facebook also post to your Twitter account. OAuth uses authorization tokens to prove identity.
Create a New OAuth Token
Creating an OAuth token in UEM is quite simple.
- Go to Groups & Settings > Configurations.
- In the empty field, search for OAuth.

- Click on OAuth Client Management
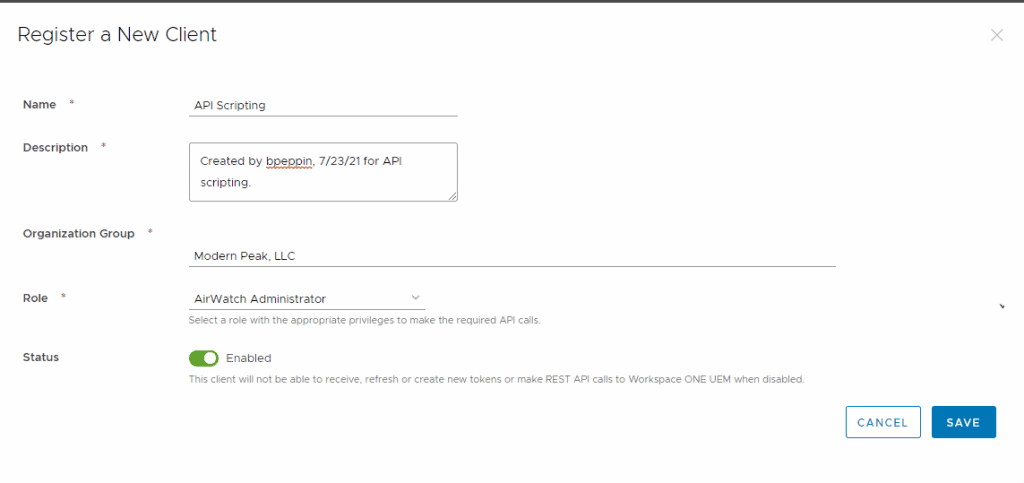
- Here is where you can create one or more OAuth tokens for different services or scripts. To create a new one, click Add.
- This will bring up the “Register a New Client” screen, and you’ll need to complete the fields.
- Name: Name it something that pertains to it’s use.
- Description: Add more details here. I recommend also adding your name and the date your created it.
- Organization Group: Specify which OG this OAuth token will have access to. Start typing and it will bring up the list of available OGs.
- Role: Give the level of permissions this token will give. The best practice is to create a list privelaged role that only has access to the API areas required. For now, I’ll set it to AirWatch Administrator.
- Status: Ensure this is enabled.

- Click Save.
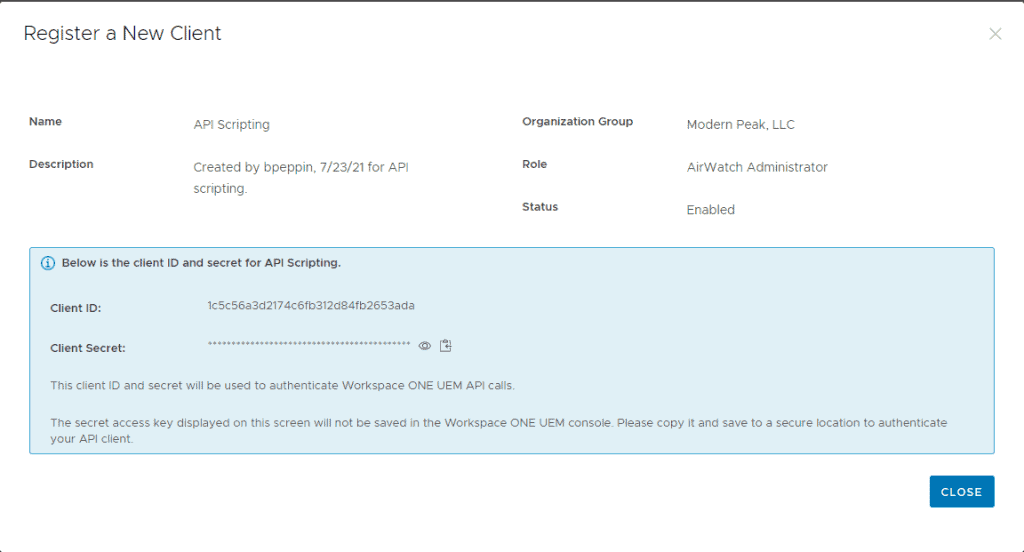
- After this, a screen will appear that will contain two very important pieces of information: the Client ID and Client Secret. The Client Secret will only be displayed on this screen one time so be sure to save it off somewhere as you won’t be able to go back and retrieve it. You will need both of these items in order to make the correct API call.

- Once you’ve saved both of these items, click Close. It should be listed now in the list.

Now that we have our OAuth token, we are reading to build our headers and create a REST API call. Let’s start with PowerShell.
Use PowerShell to Make the REST API Call
I’ll be doing this in Visual Studio Code (VSCode), but you can also do it in Powershell ISE or another tool of your choice.
Request the OAuth Token from UEM
- Create a new file in VSCode and ensure the language is set to PowerShell
- Set several variables: the UEM server, the client ID and client secret. Replace the server URL below with yours. Mine is like this:
$server = "https://cn1506.awmdm.com"
$client_id = "1c5c56a3d2174c6fb312d84fb2653ada"
$client_secret = "681E066E6EAK52DE4F5FFD6CC462EA"
- Next, we are going to need what’s called a “Access Token URL”. These are hosted by VMware and are located in each geo. There is also one for any UAT or pre-prod environment. Since I’m in the United States, I’ll be using https://na.uemauth.vmwservices.com/connect/token. Create a variable for it:
$access_token_url = "https://na.uemauth.vmwservices.com/connect/token"
- Now we need to build the body that will get passed in an API call. Note that this will include both our $client_id and $client_secret variables.
$body = @{
                grant_type    = "client_credentials"
                client_id     = $client_id
                client_secret = $client_secret
            }
- The only thing left is to send an Invoke-WebRequest call to UEM to actually get an OAuth token. The variable $oauth_token is created from property “access_token” in the web request response. I think it’s best to wrap this in a try-catch so that we can see any errors.
 try {
        $response = Invoke-WebRequest -Method Post -Uri $access_token_url -Body $body -UseBasicParsing
        $response = $response | ConvertFrom-Json
        $oauth_token = [string]$($response.access_token)

} catch {
        $ErrorMessage = $PSItem | ConvertFrom-Json
        Write-Log "Failed to create OAuth Token for: $env with following ErrorCode: $($ErrorMessage.errorCode) - $($ErrorMessage.message)" -ForegroundColor Red
    }
Run the full script and the variable $oauth_token should be populated with the token (it will look like a super long string of characters).

The full code looks like this:
$server = "https://cn1506.awmdm.com"
$client_id = "1c5c56a3d2174c6fb312d84fb2653ada"
$client_secret = "681E066E6EAK52DE4F5FFD6CC462EA"
$access_token_url = "https://na.uemauth.vmwservices.com/connect/token"
$body = @{
    grant_type    = "client_credentials"
    client_id     = $client_id
    client_secret = $client_secret
}

try {
    $response = Invoke-WebRequest -Method Post -Uri $access_token_url -Body $body -UseBasicParsing
    $response = $response | ConvertFrom-Json
    $oauth_token = [string]$($response.access_token)

}
catch {
    $ErrorMessage = $PSItem | ConvertFrom-Json
    Write-Log "Failed to create OAuth Token for: $env with following ErrorCode: $($ErrorMessage.errorCode) - $($ErrorMessage.message)" -ForegroundColor Red
}
One important thing to remember is that the OAuth token only lasts for 1 hour. So if you are testing a script and all of a sudden your calls start failing, you will need to refresh the token and the headers. For calls that take a really long time, you will have to essentially refresh the token partway through. I will cover how to do this in a later article.
Next, we need to build our headers.
Build the Headers
If you remember from earlier, a header is basically a hash table that is populated with three items: “Authorization”, “Accept”, and “Content-Type”. In the Accept, this is where you specify the version of the API. Most will be version=1 or version=2, but there are even newer ones such a v3 and v4. Try to use the latest version that is available. Because of this, let’s create two variables, one for each version. The header will also contain the OAuth token so you’ll always need to request the token first and then create the header.
$header_v1 = @{
    "Authorization" = "Bearer " + $oauth_Token;
    "Accept" = "application/json;version=1";
    "Content-Type" = "application/json"
}

$header_v2 = @{
    "Authorization" = "Bearer " + $oauth_Token;
    "Accept" = "application/json;version=2";
    "Content-Type" = "application/json"
}
Highlight those lines and run them by hitting F8. The $header_v1 variable should look something like this:

So we have our OAuth token and our headers. Now let’s put it into practice by making some practice API calls.
Example API: Query UEM Devices
To make this call, we’ll use the Invoke-RestMethod cmdlet of PowerShell although Invoke-WebRequest works fine too. Invoke-RestMethod will need three things: the URI, the METHOD, and Headers. The URI endpoint for querying devices is “$server/api/mdm/devices/search?”, where $server is populated with your UEM server as shown above. For the Method, we’ll use GET. And for headers, we can use version 1. Let’s create a variable called $devices.
$devices = Invoke-RestMethod -Uri "$server/api/mdm/devices/search?" -Method Get -Headers $header_v1
If you run that, you may notice it has a property called Devices.

To get the actual devices, we’ll need to access that property. To do that, add “.Devices” at the end like this:
$devices.Devices

Then from there, you can access properties of the Devices like SerialNumber
$devices.Devices.SerialNumber

There is so much more you can do with this such as filtering, sorting, re-organizing, and transforming the data for your use cases. We’ll need to leave that for another blog.
You may be wondering though how I found out the URI endpoint in the first place. To do that, we need to look at the UEM API help pages.
Searching the UEM API Help Pages
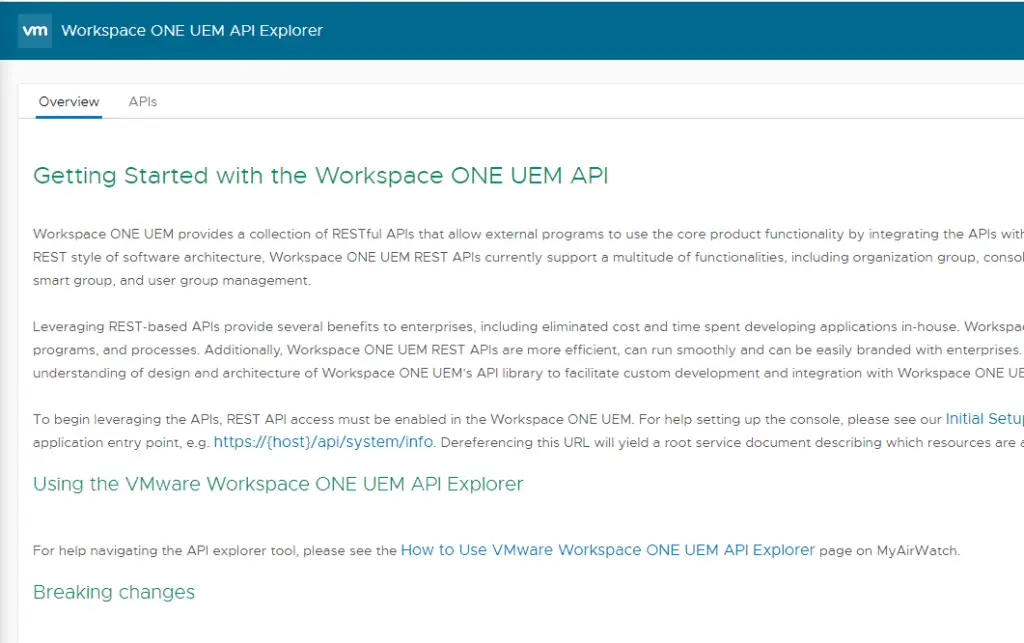
Every UEM console has its own auto-generated API help page. To access it, simply type your UEM server and add /api/help to the end: https://cn1506.awmdm.com/api/help.

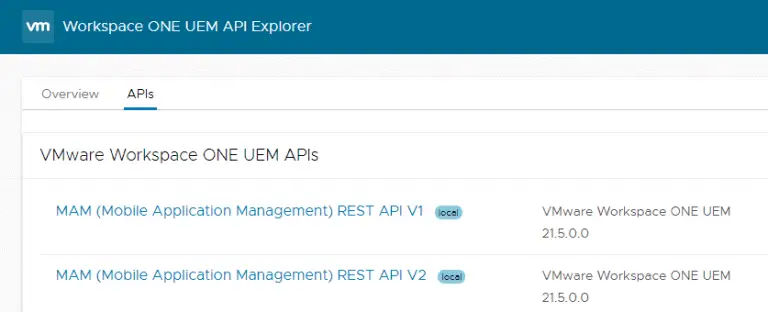
Click on the APIs tab at the top. From here you will see each of the main API “sections” and different versions. They are:
MAM – Anything related to Mobile Applications
MCM – Anything related to AirWatch content (mostly deprecated at this point)
MDM – Mobile Device Management. I use this one a lot and it will contain devices, compliance, assignment groups, tags, and more.
MEM – Mobile email management
System – Console items, settings, events, admins, users and user groups, and more.
Let’s take MDM version one for example. Click on it and then navigate to API Reference

From here you can click on each API and it will show you the URI, some documentation around it, and the various methods supported. A few notes on this whole area:
- Some of the API documentation is poor and not the clearest. Expect a fair bit of trial and error.
- Once you click on an example, you can type out a parameter (or leave them blank) and it will complete the URL. Just click “Try it Out” at the bottom. For example, the API we used above is “Devices/Search”. Clicking Try It out populates the full URL:

If I wanted to add “bpeppin” in the username parameter, it would look like this:


Note that if you see the URL with ‘as’ in it instead of ‘cn’, that is just the URL pointing directly to the API servers. Using ‘cn’ will auto re-direct to the API servers automatically. Using either will work fine.
Sample Script
If you’d like to access the script examples I’ve outlined in the blog, you can check them out here.
Conclusion
Now you know the basics of UEM REST API, how to leverage OAuth tokens, and how to use PowerShell to make API calls. Understanding all of this is an important piece of effectively managing devices in Workspace ONE. It opens up many new doors of customization, automation, and integration with third-party services.

This was super brilliant and exactly what I needed to get started. More simple guides like this would be great.
Thank you! I’m glad it helped 🙂
Hi Brooks,
You know if theres any way to delete through API calls the queued commands in Workspace ONE UEM of a device that has a stuck command?
No, I don’t believe there is a way to clear out the queue unfortunately. Sometimes sending a “remove” command on the particular profile or app can clear it up.
Hello Brooks,
do you have further details about using API to create enrollment tokens? I’ve found the POST “enrollment-tokens” API, but the needed RegistrationRecord attribute is not explained at all. We’d like to reproduce the “Add Device” action on the console, generating a token for the user.
Thanks
Hello Brooks,
do you have further insights about the API to create device enrollment token? It requires many parameters, but none of them is clearly explained in the documentation.
Hi Brooks,
looks for an instructions to create API for reassign windows device to different user from WSOne UEM Console or directly from device. Please, enlighten me if you’ve any possible ways for this.
There isn’t one due to security reasons. The initial assigned user has to authenticate somehow and so they don’t want admins changing things around as that can affect SSO into other resources. You will have to un-enroll and re-enroll the device to switch it.
I’m certain I’m not the only one that’s working on automating API calls with powershell. Is there a group where people share work? Copy-pasta is the best pasta!
You aren’t! My bulk actions scripts are on GitHub and VMware{code}.
Hi,
Thanks a lot for this article, it was really helpful to start with my Powershell script.
I’m having an issue and I don’t know if anyone would have a bit of experience with it, I cannot find a way to change a user role assigned to a user, apparently, I need the role id but I could find any API URL that could allow me to extract this data