
Implementing Windows Hello for Business, as outlined in my previous blog, is not so much difficult as it is tricky to get all of the little pieces in place. Often it comes down to one simple checkbox, setting, or configuration, and wham! it starts working. In this blog, I will outline the most common issues I’ve seen as well as the proper troubleshooting steps you can take to get this thing working smooth.
Pre-Reqs
- You’ve followed the steps outlined in my previous blog
- You are using the Key-Trust method only (not cert-trust)
Microsoft’s Known Issues Page
Microsoft has a pretty good page documenting known issues with deploying Hello for Business, so definitely check that page first to see if your issue is listed there.
Check Domain Controller Version
You can deploy Hello for Business in an environment with Server 2008 R2 domain controllers, but you must ensure that each Active Directory site has at least one domain controller running Server 2016. And by “site”, this means a site configured in Active Directory sites and services.
NOTE: There is a known bug with key trust authentication on Server 2019 so be sure you have KB44887044 installed in order to fix that issue.
- Addresses an issue that causes the Windows Hello for Business Hybrid Key Trust deployment sign-in to fail if Windows 2019 Server domain controllers (DC) are used for authentication. The error is, “That option is temporarily unavailable. For now, please use a different method to sign in”. If Active Directory (AD) activity tracing is enabled, a Local Security Authority Subsystem Service (LSASS) exception may occur in the Windows 2019 DC when processing a user’s sign in.
Note: The AD Data Collector Set and Microsoft Azure Advanced Threat Protection (AATP) enable Active Directory activity tracing by default.
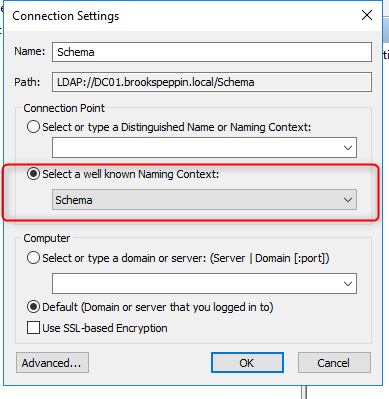
Check Active Directory Schema
You need to ensure your Active Directory schema is set to 2016 version or higher. You can check this a few different ways:
ADSI Edit
- Launch ADSI Edit on your domain controller. (Server Manager > Tools > ADSI Edit)
- If you haven’t ever connected to the Schema before, you may need to right-click the top node titled “ADSI Edit” and click Connect To.
- Click the radio button Select a well known Naming Context, and click Schema.
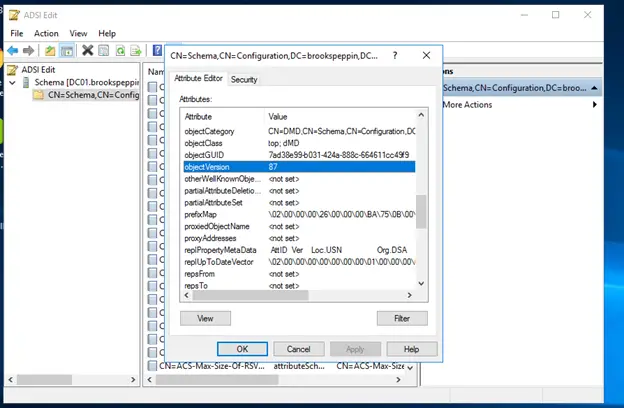
- Expand the Schema and right click the folder with “CN=Schema,CN=….” in the name and click Properties.
- Find the “objectVersion” attribute and verify that it is set to 87, which corresponds to Schema 2016.
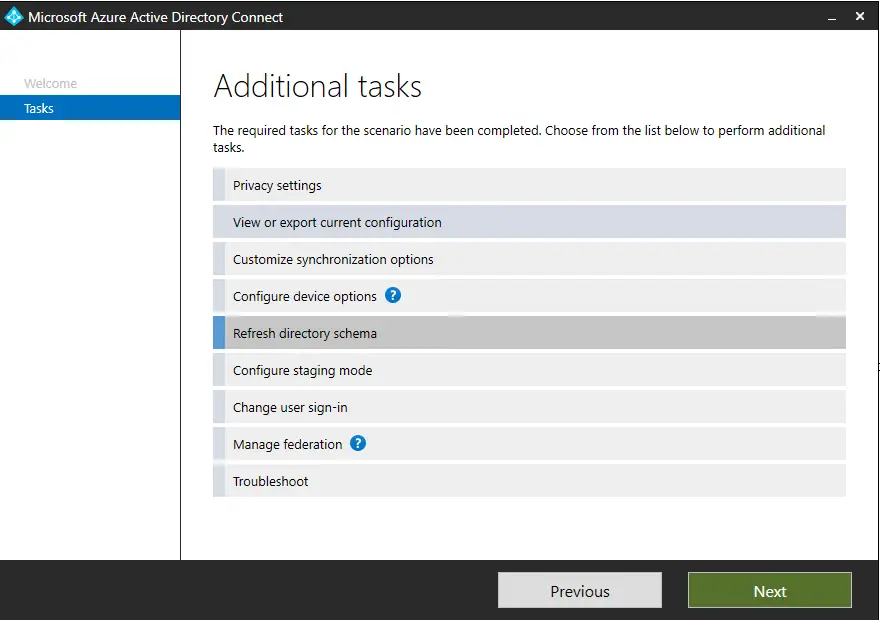
Refresh Directory Schema
You may need to refresh the directory schema on AAD connect in order for the new msDS-KeyCredentialLink attribute to show up and start sycning.
- Log onto your Azure AD Connect Server
- Launch the Auzre AD Connect application
- Select Refresh Directory Schema and click Next.
- Authenticate with Azure AD Global administrator credentials
- Select the correct directory and click Next
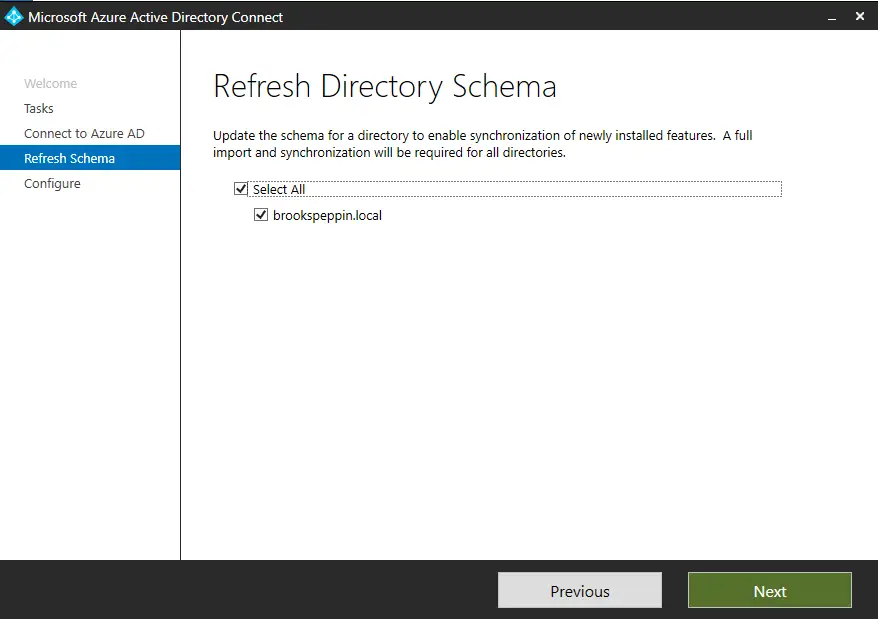
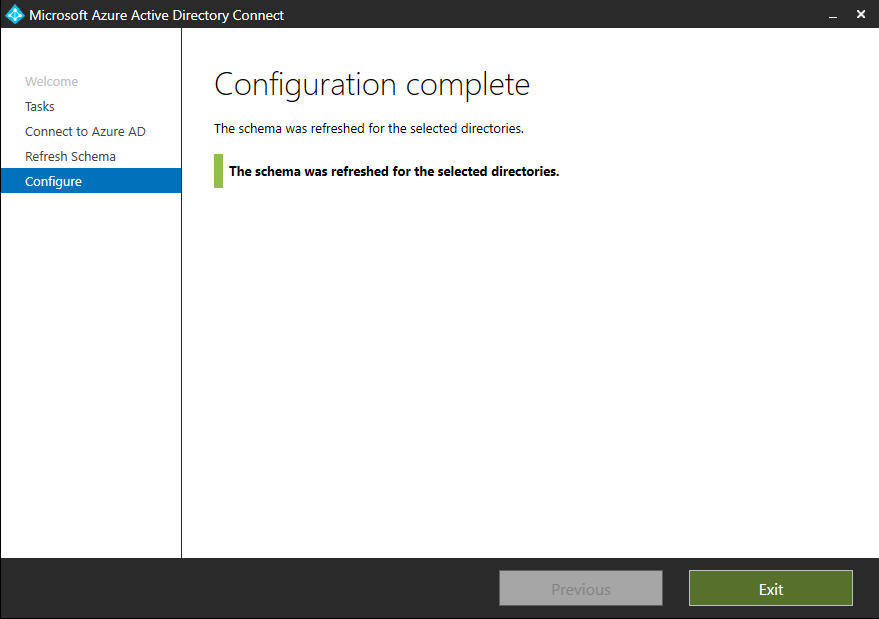
- On the “Ready to Configure” page, click Configure. Note that this will do a full directory sync when complete. This can take awhile depending on the size of the environment.
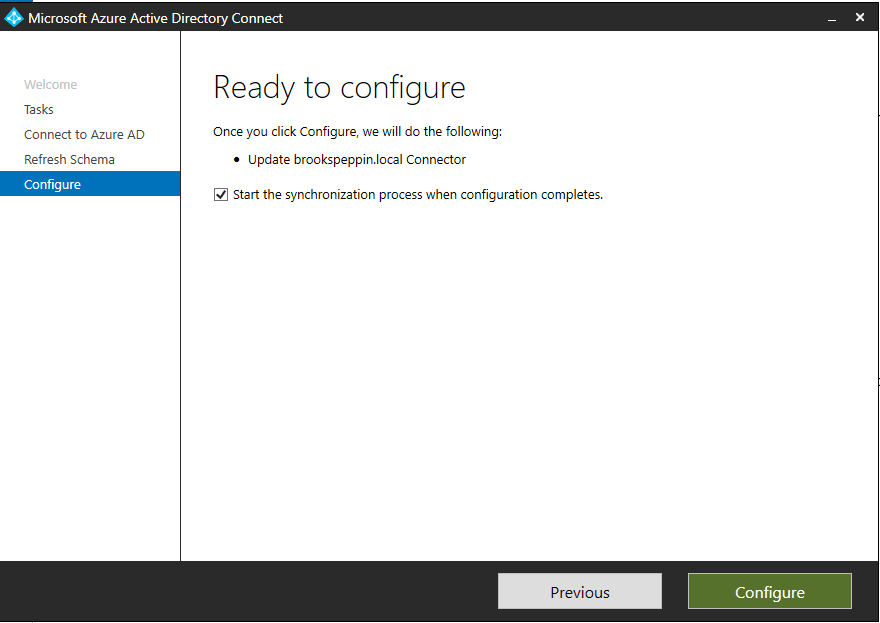
- When complete, it will show “Configuration Complete”. Click Exit to close the application.
Can you get to your CRL Distribution Point (CDP) in a web browser?
This one is a pretty quick check and ensure that your CDP is correctly configured and has open access.
Load up a web browser and navigate to your CDP. In my case, it was set to http://pki.brookspeppin.local/crl
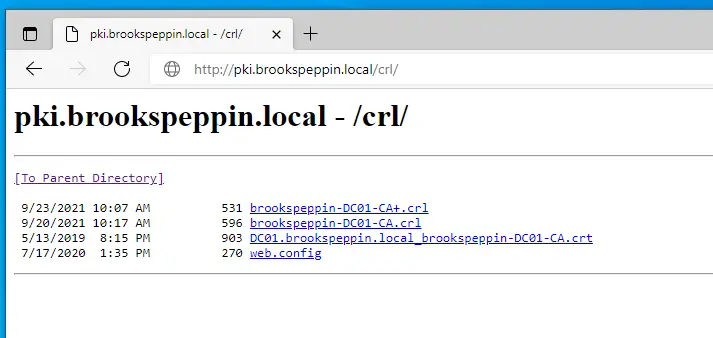
You should see two files ending in “.crl” and one of those being a delta file which has the “+” symbol. You should also see a .crt file.
Can you download the CRL file, delta CRL file, and the CRT file?
If you can succesfully get to your CDP (in the previous step), can you actually download the files? Click on each one to download. If you have issues downloading the delta file (the one with the ‘+’ in it), then you may need to fix IIS. If that is the case, move onto the next step.
Have you enabled “allowDoubleEscaping” in IIS?
Enabling “allowDoubleEscaping” in IIS ensures that the delta file can proper download because it has a ‘+’ symbol in the file name. To configure this, see this section of my previous blog.
Are your certs expired?
This is an easy one to overlook, but make sure all certs deployed to domain controllers and clients are not expired.
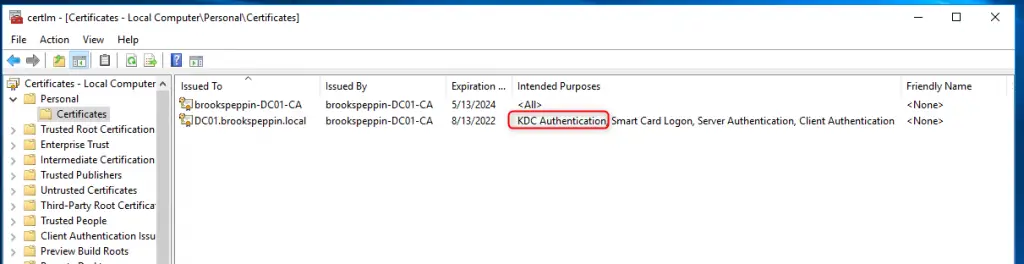
Do the Domain Controller templates have the correct “Intended Purpose”?
On your domain controllers, do each of them have the new “Kerberos Authentication” certificate template installed that has “KDC Authentication” as one of the intended purposes? To check:
- Open certlm.msc on a DC
- Expand Personal and click on Certificates folder
- In the certificate issued, ensure that you see “KDC Authentication” as one of the intended purposes.
If you still see the old one, go ahead and delete it. If you don’t see this there, make sure to re-issue the certificate. You can do that by following the steps here.
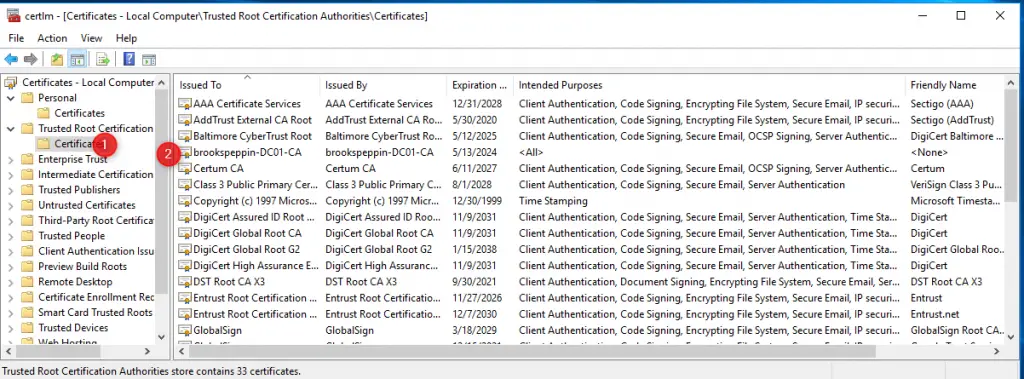
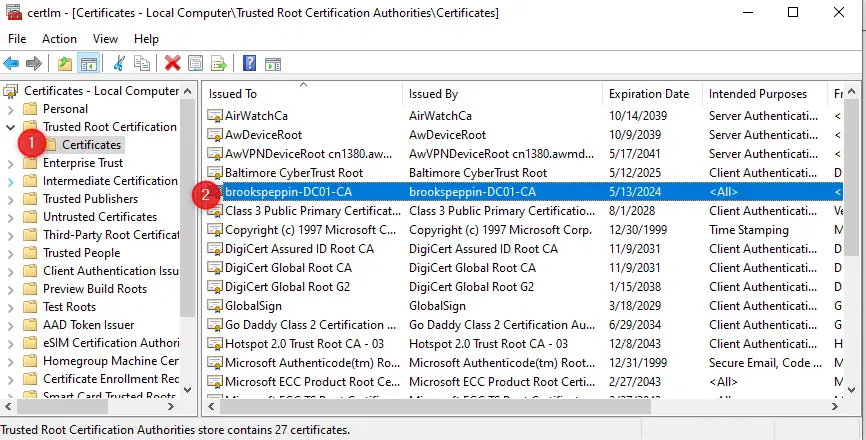
Is the Root Certificate installed on the client?
Make sure that the root certificate is installed on the client. If you are doing Out-of-the-box experience (OOBE) and Azure AD joining systems, this won’t be installed automatically as part of GPO. You will need to install it manually (for testing) and then eventually via a management tool like Workspace ONE or Microsoft Endpoint Manager. Here’s how to do it manually:
- On the Domain Contoller, load up certlm.msc and navigate to Trusted Root Certificates > Certificates.
- Find the trusted root certificate.
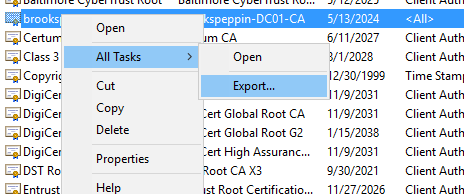
- Right-click it, select All Tasks > Export.
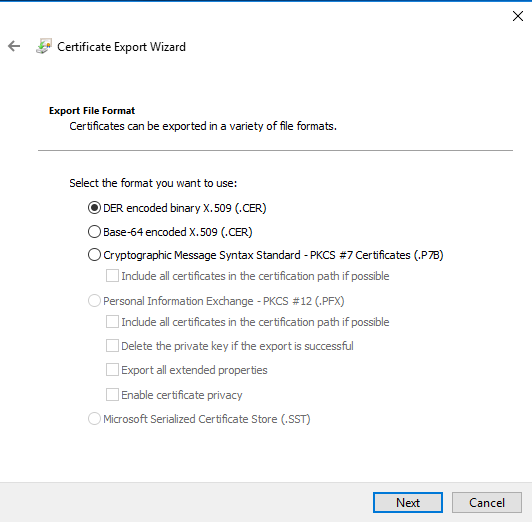
- Click Next on the Certificate Export Wizard.
- On the file format page, select DER encoded binary X.509 (.cer). I’m pretty sure the base-64 encoded one will work fine too.
- For the file name, name it something like “RootCA” then click Browse to pick the directory to save it to.
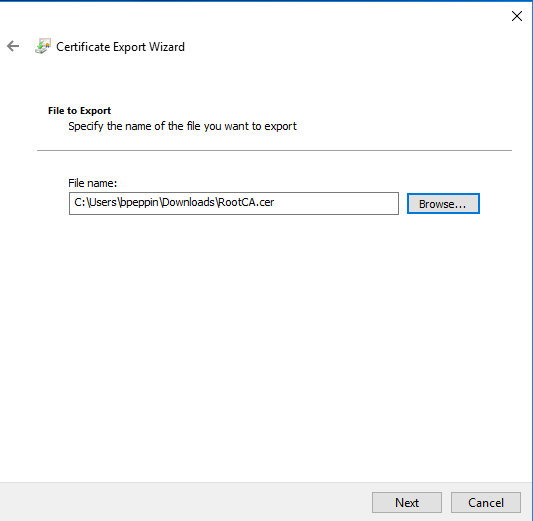
- Click Next and then Finish.
- Copy that to the client that is testing WHFB. Right-click it and select Install Certificate.
- Select Local Machine as the store location.
- When prompted for the location, select Place all certificates in the following store.
- Click Browse and pick Trusted Root Certification Authorities.
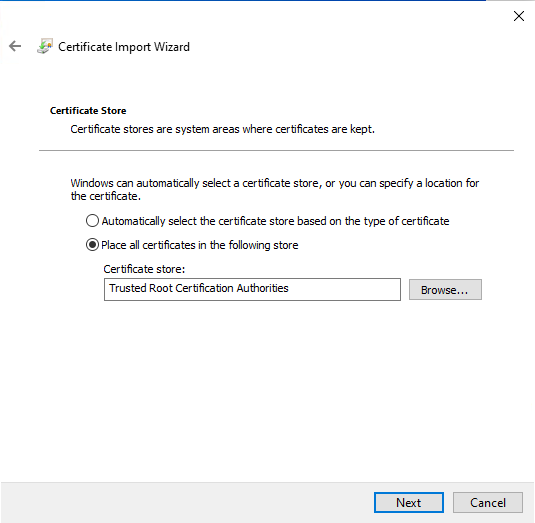
- Select Next and Finish.
- Ensure that it is installed correctly:
Is a DNS entry correctly configured for your PKI?
You’ll want to make sure that DNS is correctly configured for your PKI server and corresponding CDP. You will also want to make sure that client can access it! It is easy to build some of this out in a lab, but then you accidentally place the client on a different network and it just can’t access your CDP.
- On the client load up a command prompt
- Ping your PKI pki.brookspeppin.local
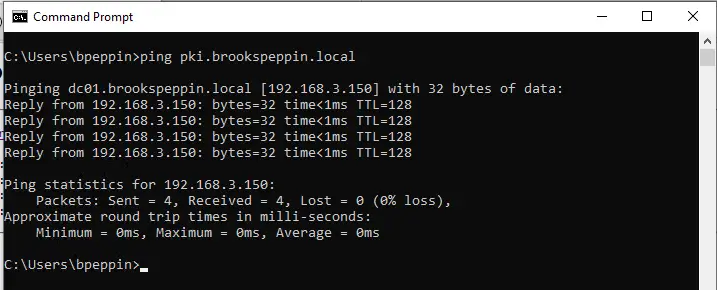
If you can’t reach it then ensure you are on the proper network as your PKI.
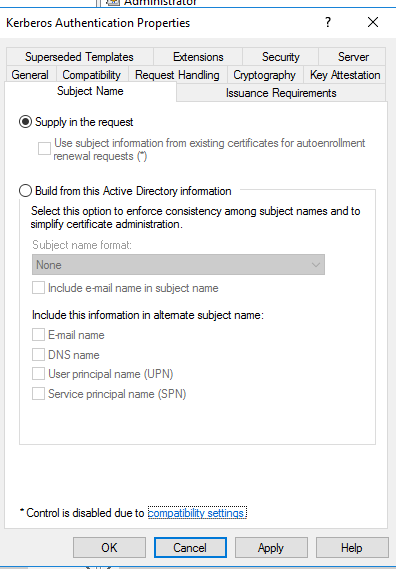
Check template Subject Alternate Name
One of my readers mentioned to me that you may need to configure the subject alternate names. I haven’t personally needed to do this so your mileage may vary. This may also just be related to Server 2019 so I’d recommend going through all of the other troubleshooting steps first. You can check what the current Subject Alternate Names are set to by opening up the cert deployed under the “Personal” folder (again, this is on the domain controller).
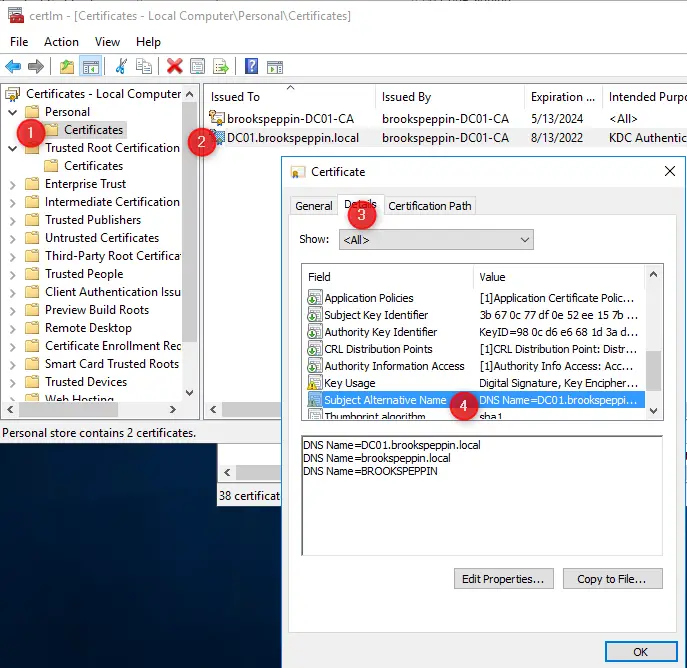
Yours should be similar to mine. If these are missing or are incorrect, you can change the template so that you can manually provide them when the cert is generated.
- Load up the Kerberos Authentication template
- Navigate to the Subject Name tab
- Switch it from Build from Active Directory to Supply in the request
- Switch back to the local certificates store (Personal) and request a new cert.
- Select Active Directory Enrollment Policy
- Select Domain Controller Authentication (Kerberos) and click Enroll. You should see a new “More information is required to enorll for this certificate” message now.
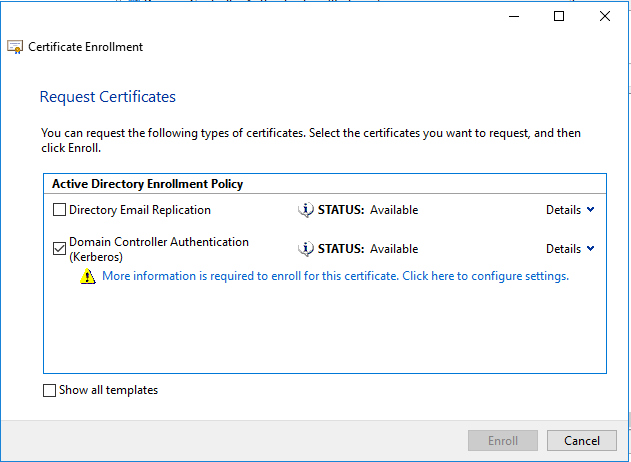
- Click on that message. Select DNS under Alternative Name section and add each of those 3.
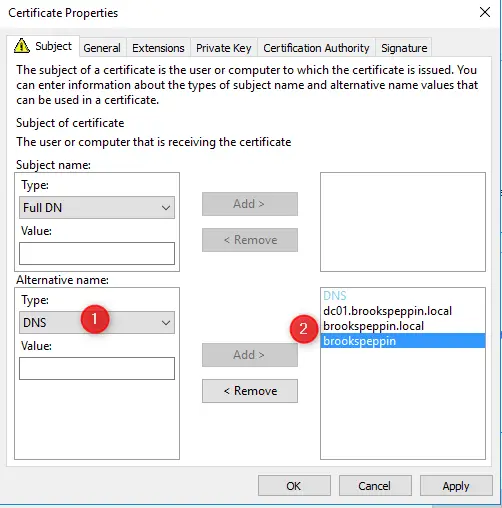
- Click OK and then Enroll.
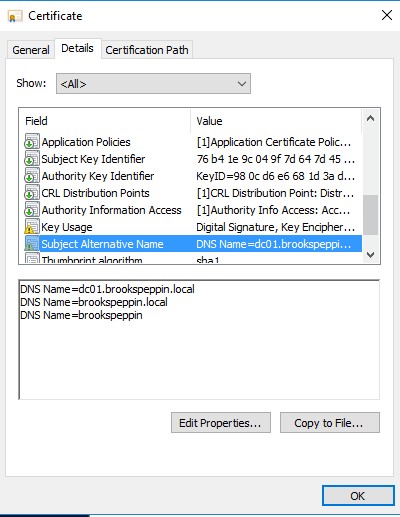
- Double-check the newly issues cert to make sure that the Subject Alternate Names are properly configured.
Run the WFfB Checks PowerShell Script
Adam Gross replied to my post on Twitter letting me know about some awesome PowerShell scripts that OnPremCloudGuy put together to check to see if your environment is ready for Hello for Business.
The scripts are located on his Github here. To run this script, follow these steps:
Pre-Reqs
- RSAT Active Directory Tools installed and enabled
- MSOnline module installed (Install-Module MSOnline)
- Additionally, WinRM needs to be enabled on servers you will be targeting
For simplicity, I’ll just be running this on one of my DCs. This module isn’t published to the PowerShell Gallery so we’ll have to install it manually from GitHub.
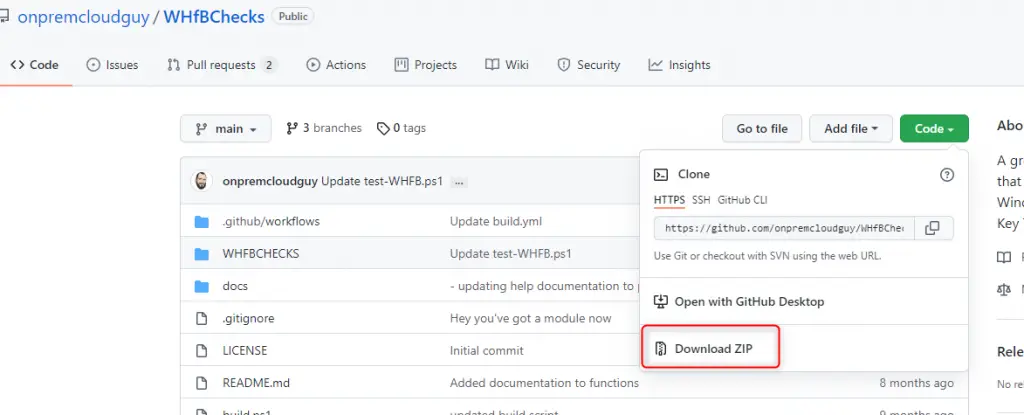
- On the WHfBCheck page, click Code > Download Zip
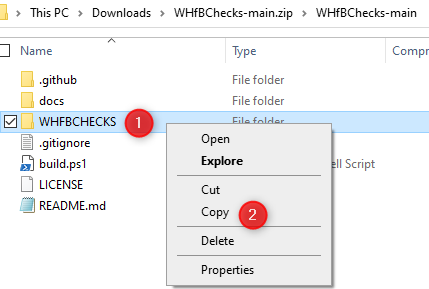
2. Open the zip and navigate to WHfBChecks-main.zip\WHfBChecks-main. Copy the WHFBCHECKS folder and paste into C:\Program Files\WindowsPowerShell\Modules

- Load elevated PowerShell command windows and type:
Import-Module WHFBCHECKS

- Then run the Test-WHFB function to perform all of the checks. A few notes:
- On the first prompt for credentials, enter an active directory admin
- On the second prompt, enter an Azure AD global admin (this will use modern auth so you may need to add exceptions to the various websites the MS needs).
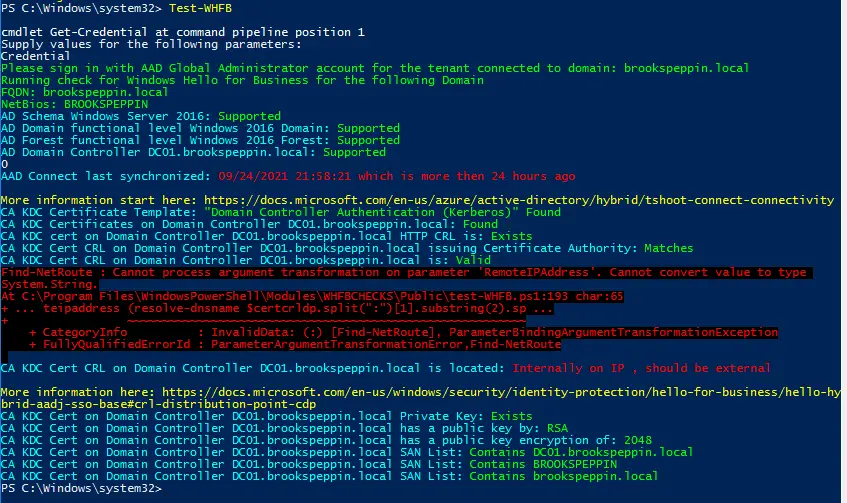
Looks pretty good! If you have any feedback on this script reach out to Steve on Twitter or create an issue on Github.
Conclusion
And that’s it! Hopefully, these steps helped you put the last piece of the Windows Hello for Business puzzle together. Did I miss any? Let me know in the comments below.
Hi Brooks, I know I am early but did you successfully tried this also with Windows 11?
Somehow I cannot get it to work. I have a Windows 10 where it works perfectly fine. And the Windows 11 device with same user has a empty klist and gets errors in the event logs when connecting to an on prem file share.
Hi Matthias and Brooks, I’m experiencing the same issue after recently upgrading to Windows 11. The solution worked flawlessly on Windows 10 however I cant seem to get it to work with Windows 11 and I’m wondering if something has broken or if Windows 11 has a bug with this feature
Thank you so much for this! I’ve been banging my head on this setup for weeks, and this helped me finally nail down the couple missing pieces. I really wish MS documentation would be more straight forward about the actual requirements.
Thank you Mike! Glad it helped.
So it works for me. I complete MFA when registering the pin and Event ID 300 shows successful registration. However, my laptop does not prompt me for the pin to login, it still asks for a password. I thought this was a GPO, but I cannot find any GPO that would prevent it from letting me use a pin, in fact, my GPOs are set to us WHfB.
With testing, I found that if my device is ONLY connected to AAD, then it will prompt for pin to login. But the moment I join it to our domain, it does not.
Any ideas?
At the login screen is there an additionally button to choose which method to sign in with (Usually under “sign-in options”)? I believe for regular domain-joined systems you need to run on “Convenience PIN sign-in” under this GPO – Computer Configuration\Administrative Templates\System\Logon
You may also be able to set this registry key
[HKEY_LOCAL_MACHINE\SOFTWARE\Policies\Microsoft\Windows\System]
“AllowDomainPINLogon”=dword:00000001
So I have a weird one.
When running the test, I get this:
CA KDC Cert CRL on Domain Controller DC.domain.local issuing Certificate Authority: Does not Match
I checked where my Kerberos Domain controller template is pointing, and it’s pointing to http. Have Root CA installed, everything looks good except for that!
I have the same Does not Match error. Did you manage to find a way of passing that test?
Hi Brooks,
I have setup the keytrust it works great. Today i have tested Cloud Trust for a other customer do you know if it’s possible to migrate away from a current key trust setup to cloud trust?
Kind regards,
Pieter